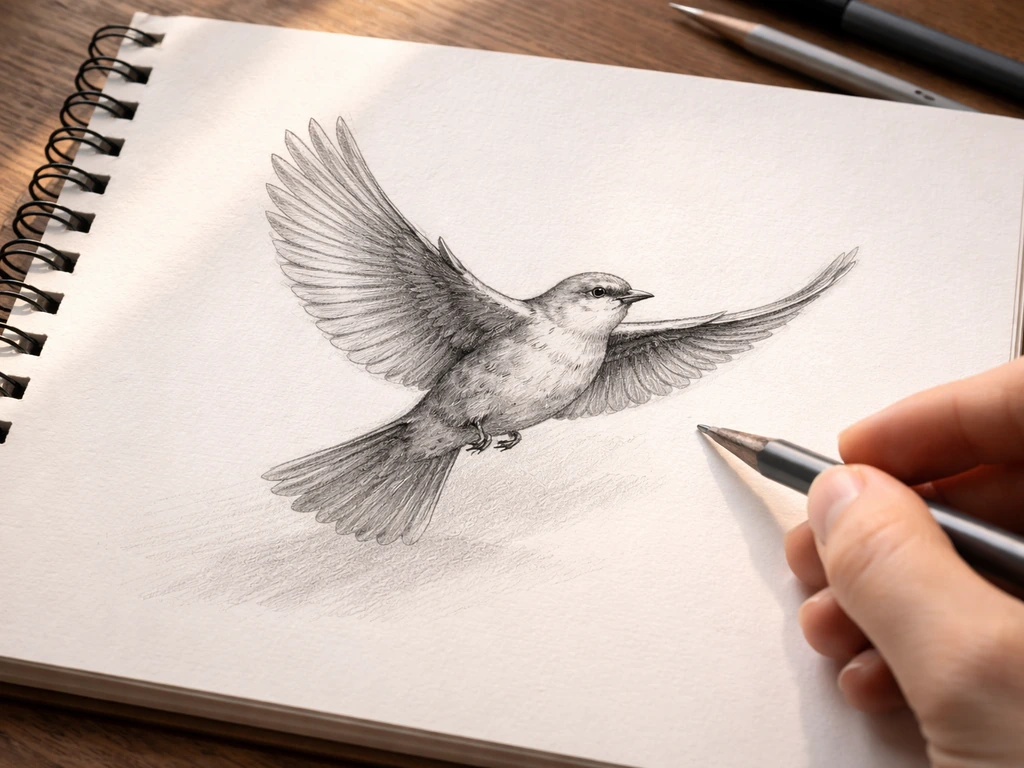
To draw a convincing bird in flight, you need to work through a specific sequence: nail the gesture line and pose first, build a simple 3D body from basic shapes, position the wings to match what they're actually doing aerodynamically (flapping vs gliding looks very different), then layer in the tail, head, feet, and feather detail.
How to Draw a Bird Flying in the Air Step by Step
Marcus Chen
8 Jun 2026
If you also want to learn the flying bird html code approach for online tutorials, you can adapt these steps into simple, readable diagrams. Skip that order and you'll end up with a bird that looks frozen or anatomically wrong. The good news is that once you understand a little about how bird wings actually work, your drawings start to make sense almost automatically.
If you're learning how birds fly, this class 3 explanation breaks the process into simple steps you can visualize while you draw how does a bird fly class 3.
Start with a pose plan and reference photos or videos
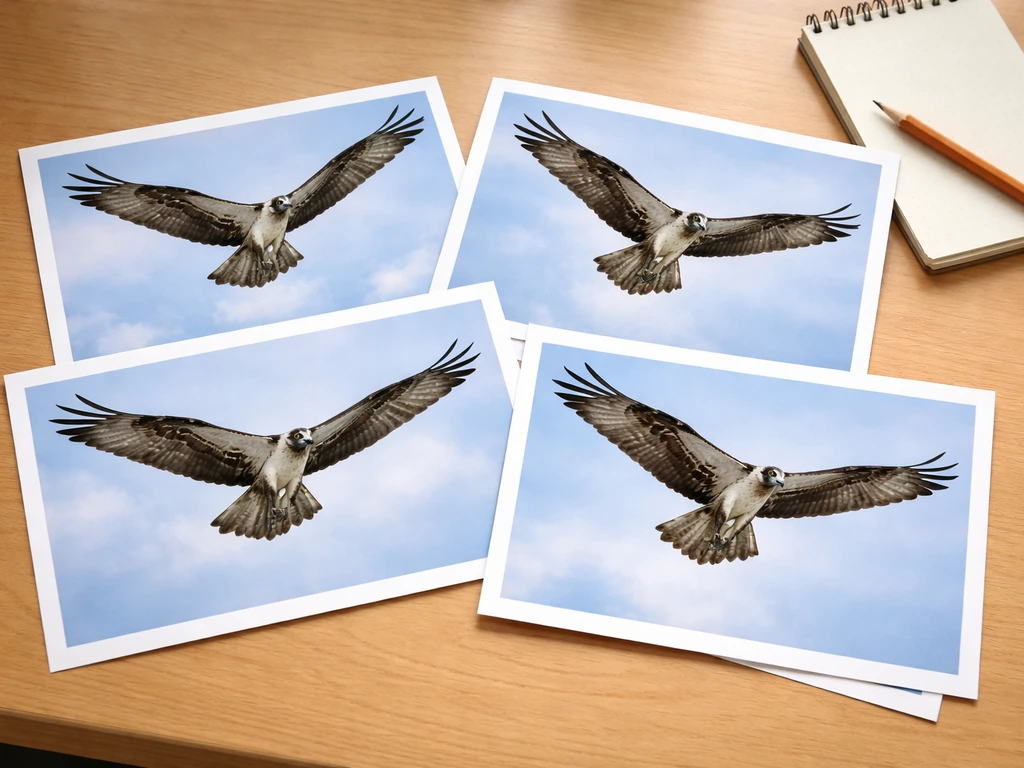
Before you put any serious lines on paper, collect reference. This is non-negotiable. A quick search on Cornell Lab's eBird media library, Audubon's photo archive, or even YouTube slow-motion footage of birds in flight will give you dozens of usable frames. What you're looking for are images that show a clear moment in the wingbeat: the downstroke (wings fully spread and angled down), mid-upstroke (wings partly folded), or the full glide (wings extended and nearly flat). Each of these looks radically different, and mixing them up is one of the most common beginner mistakes.
From your reference, pick one specific moment and commit to it. Then do a quick thumbnail: a tiny 2-inch sketch where you're only capturing the major gesture. This is where Audubon's classic advice about an axis line comes in handy. Draw a single line that represents the direction the bird's body is traveling and its tilt relative to the horizon. Everything else, the head, the wing arcs, the tail, gets aligned to that line. It sounds almost too simple, but that axis is what prevents your bird from looking like it's floating randomly in space rather than moving through air.
- Use slow-motion video for flapping sequences; freeze a single frame that shows a decisive wing position
- Use still photography for gliding or soaring poses, which are easier for beginners to start with
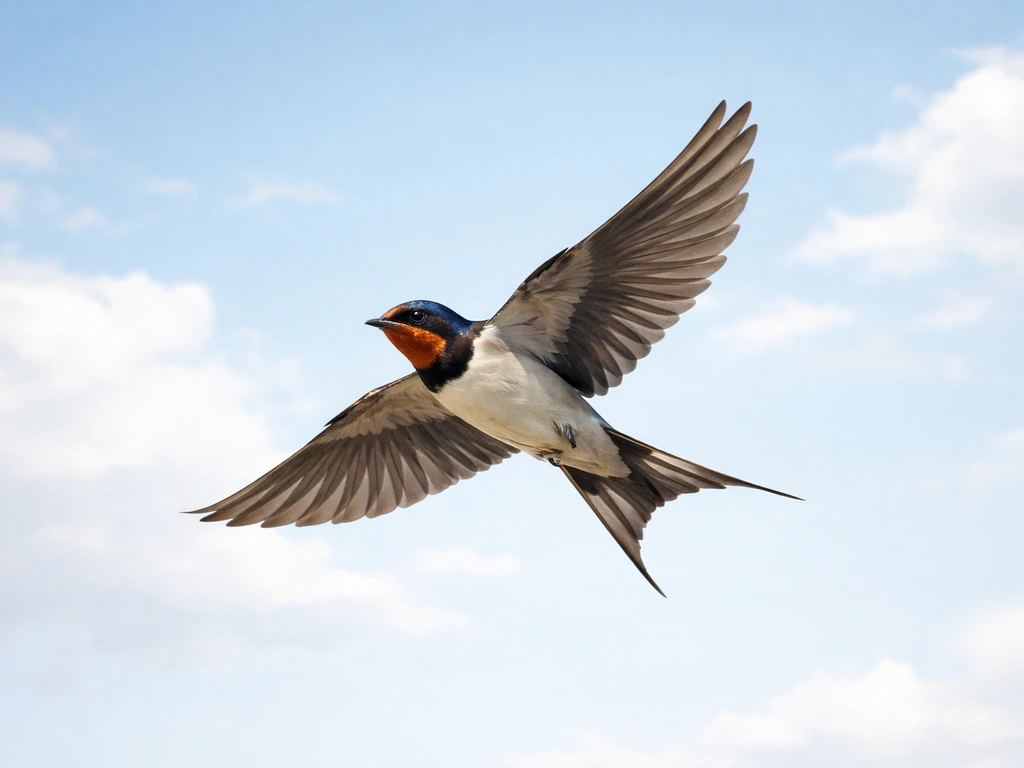
- Pick reference that matches your target species: a hawk's broad, slotted wings look nothing like a swallow's swept, pointed ones
- Collect at least three reference images from different angles (side, below, 3/4) before starting a finished drawing
- Sketch 5 to 10 tiny thumbnails from different reference frames before committing to one pose
Sketch the bird's proportions and 3D body form
Once you have your pose nailed in thumbnail, scale it up and build the body as three-dimensional forms, not flat outlines. Start with two overlapping ovals: a larger one for the chest and torso, a smaller one for the head. The torso oval should feel egg-like and slightly tapered toward the tail. These ovals are placeholders, but they force you to think about the body as a volume sitting in space, which is what makes a bird look like it has weight and physical presence rather than being a flat shape stamped onto the sky.
At this stage, lightly block in the major masses: the shoulder area (where the wings attach to the body), the rough line of the spine, and a simple wedge for the tail. Pay attention to how the chest is the thickest, deepest part of the bird. Flying birds have a massive keel bone running along the sternum where the flight muscles attach, so the chest protrudes noticeably. The bird's body actually narrows quite quickly from the chest toward the tail, and getting that taper right is what separates a convincing form from something that looks bloated or tube-like.
Keep everything loose at this stage. If you're tightening up your lines before you've confirmed the proportions are correct, you'll resist fixing mistakes later. This is just structure, not detail.
Draw wing positions that match flight mechanics
This is where understanding bird biology pays real dividends in your drawings. A bird wing has the same basic bones as a human arm: a humerus (upper arm), forearm bones (ulna and radius), and a hand region where the bones are fused into a structure called the carpometacarpus. The wrist joint between the forearm and the carpometacarpus is the main hinge you'll see bending in a wing. During flight, the wing flexes at three points: the shoulder, the elbow, and the wrist. When you draw the wing, you need to show all three of those landmarks, not just a vague curved shape.
Flapping vs gliding: two very different silhouettes
A gliding bird holds its wings relatively extended and flat, with the elbow and wrist straightened out. The wing reads almost as one long continuous surface. A flapping bird, by contrast, shows dramatic angle changes across the wingbeat. On the downstroke, the shoulder drops, the elbow extends, and the whole wing drives downward and forward. On the upstroke, the wing actually folds partially at the wrist and elbow to reduce drag, pulling the primary feathers upward and sometimes allowing them to separate and rotate. Research on wing kinematics shows that upstroke mechanics are far more variable than downstroke mechanics, so if you're drawing a mid-upstroke position, don't just mirror the downstroke. The wing will look more flexed and compact.
A practical construction tip: sketch a loose V-shape from wingtip to wingtip when you're blocking in the wing spread. This gives you the overall span and tilt angle immediately, and you can refine the curve and joint positions from there. For a gliding pose the V will be very shallow (almost a straight horizontal line). For an active downstroke the V will be deeper and the wings will angle forward at the leading edge.
| Flight state | Elbow/wrist position | Wing silhouette | Primary feathers |
|---|---|---|---|
| Active glide | Extended, relatively straight | Long, flat, broad surface | Closed and aligned, tips slightly spread |
| Downstroke (flap) | Extended at shoulder and elbow, wrist forward | Wide, angled downward and forward | Spread and driving downward |
| Upstroke (slow speed) | Wrist and elbow flexed, wing folded inward | Compact, narrower profile | Rotated, often fanned or separated |
| Soaring (thermal) | Fully extended, slight droop at wrist | Very broad, often with slotted tips | Splayed at tips, creating leading-edge slots |
Add tail, head, and leg or feet placement for realism
The tail is not just decoration. Birds use their tails aerodynamically as a combined rudder and elevator, generating lift and controlling yaw (left-right turning) and pitch (nose up or down). ScienceDirect research on tail effects on yaw stability in birds describes the tail’s aerodynamic role in providing directional control cues, including a rudder-like function for turning [combined rudder and elevator](https://www. sciencedirect.
com/science/article/pii/S0022519307003402). Research on tail aerodynamics shows that tail angle and fanning state strongly influence what the bird looks like it's doing, so your drawing should reflect that. A bird in a straight, level glide will show a moderately spread tail held roughly in line with the body. A bird banking into a turn may show the tail tilted slightly in the direction of the turn.
A bird landing or braking will show a fully fanned, almost circular tail spread wide open, like a hand of cards, while the body tilts back. When the bird sees the solid ground, that landing and braking moment often comes with dramatic changes in the tail and wing positions fanned, almost circular tail spread wide open.
Block the tail as a fan shape first, then subdivide it into a small number of individual feathers (the rectrices). Don't try to draw every tail feather individually from the start; get the overall fan geometry right and then add detail. A common mistake is drawing the tail as a simple flat rectangle. Real tails have a slight convexity when fanned and a depth to them that shows they're three-dimensional structures attached to the bird's rump.
For the head: in active flight, most birds hold their head roughly in line with or slightly above the body axis, looking forward. The head should feel like it's attached to a neck that connects smoothly into the torso, not perched on top like an afterthought. Place the eye roughly in the center of the head mass, toward the side. Keep the beak pointing in the direction of travel unless you're drawing a bird that's actively looking to the side.
Legs and feet are often invisible in fast flight because most birds tuck them against the body to reduce drag. For slow flight, landing approaches, or certain species that fly with legs trailing (like herons), include them. When tucked, feet appear as a small angular bump under the lower belly or tail base. When extended, sketch them as simple geometric shapes before adding toe detail.
Feather detail, direction of forms, and edge shapes

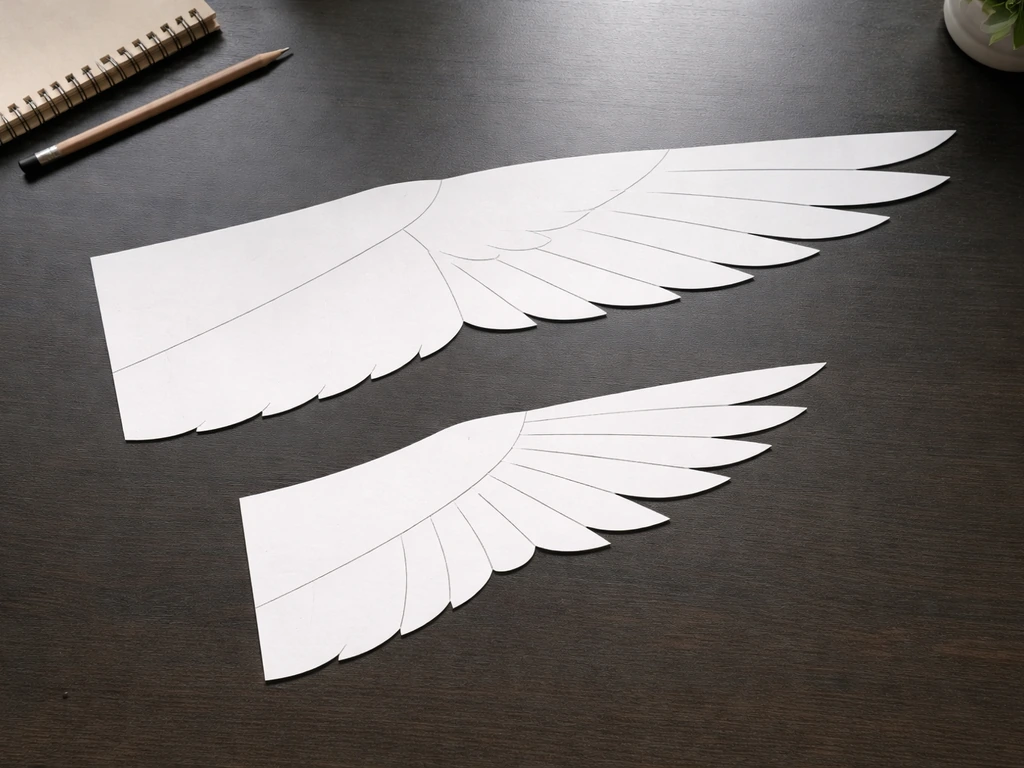
Flight feathers split into two main groups that look and behave very differently in a drawing. The primaries are the long, narrow outer feathers attached to the hand region (the carpometacarpus and beyond). If you are unsure how that carpometacarpus hand region should read in motion, compare flying bird hand vs normal wing positions so your silhouette matches the mechanics.
They're asymmetric, meaning the leading edge of each feather is narrower than the trailing edge, and they can be individually rotated to control airflow. Visually, primaries read as segmented, spread, and slightly stepped at their tips. The secondaries sit inboard, attached along the forearm (ulna), and they overlap tightly to form a broad, airfoil-like surface that generates most of the lift on the downstroke. Secondaries read as a more unified, smooth surface rather than individually distinct feathers.
When adding feather detail, work in layers from body outward: body contour feathers first (small, smooth, covering the torso), then the wing coverts (rows of smaller feathers that overlap the base of the flight feathers), then the secondaries as a grouped block, then the primaries individually. This layering approach keeps the feathers reading as three-dimensional overlapping structures rather than flat patterns drawn on a surface.
Draw your primary edges with a slightly varied, stepped contour rather than one smooth arc. Real primaries have different edge curvatures from each other, and that variation is part of what makes a wing look organic. The trailing edge of the wing (the posterior edge of the secondaries) should be a gentle, somewhat irregular curve, not a ruler-straight line. On the leading edge, draw a clean, tighter curve that implies the stiff, aerodynamically shaped front of the wing.
Feather direction matters a lot for conveying three-dimensionality. On the wing surface, coverts angle backward and slightly downward toward the trailing edge. On the body, feathers generally flow from head toward tail. Draw your strokes following those directions and the bird will immediately look more real, because the underlying surface logic will be consistent.
Perspective, tilt, and composition for birds flying across the sky
The angle you choose to view your bird from changes everything about how you construct it. A bird seen from the side is the easiest starting point: you can see the full wing profile, body shape, and tail clearly. A 3/4 view from slightly below and behind is dramatic and very readable, showing both the wing span and the body volume simultaneously. A bird flying directly toward the viewer is the most challenging because the wings foreshorten dramatically: what should be a long wing span becomes a much shorter shape angled toward you. In that case, use the V-shape construction to block in the foreshortened wings and let the body mass dominate the composition.
Body tilt is crucial for communicating motion. A bird in active flight rarely sits perfectly level on the horizon. The body tilts slightly nose-down during a powered dive or fast descent, and slightly nose-up during a climb or braking approach. Even in level flight, there's often a subtle forward lean to the body that reads as momentum. If your bird looks like it's hovering in place rather than moving, check whether the body axis is tilted or completely flat relative to the horizon.
For composition in a sky setting, think about where the bird sits relative to the picture plane. Placing the bird slightly off-center with open space in front of it (in the direction it's traveling) gives the composition room to breathe and implies the bird is moving into that space. A bird placed dead-center with equal space on all sides will look static. If you're drawing multiple birds, stagger them in size and altitude to imply depth: birds higher up and farther away should be smaller and less detailed.
Shading, lighting, and quick checks for common mistakes
Lighting a bird in flight works best when you pick a consistent light source and stick to it. In outdoor scenes, sunlight usually comes from above and slightly to one side. The upper wing surface will be the lightest value, the underside of the wing will be shadowed, and the body will have a dark shadow on the side away from the light. The leading edge of the wing often catches a highlight, especially toward the wing tips where the primaries catch direct light. The trailing edges of the wing and tail fall into soft shadow.
A useful painting and drawing technique is to add soft shadow on the trailing edges of the wing sections and brighten the leading edges, particularly along the primary tips. This reads as directional movement and gives the wing its airfoil character. Keep your underwing shadow consistent with the wing section that's actively generating lift: the broad secondaries (inner wing) will show a deeper curvature shadow on the underside than the flatter, more horizontal outer primaries.
If you're drawing a bird against a bright sky, the underside may appear quite dark or even silhouetted, depending on the angle. That's actually correct. Photographers working with birds in flight deal with this constantly: the sky acts as a backlight, and the underside of the wing can lose most of its internal detail. Embrace that as a shading option rather than fighting it.
Common mistakes and how to catch them fast
- Wings that look identical on both sides of the body: unless the bird is perfectly level and symmetrical (rare in active flight), one wing will be higher or at a different angle than the other. Check your reference.
- The wing bends in the wrong place: the main hinge is at the wrist, not the middle of the wing. If your wing looks like it bends at the midpoint, move the joint toward the outer third.
- A flat, horizontal body axis: add a slight tilt to show direction of travel. Even a 5-degree tilt transforms a static bird into one that reads as moving.
- Tail shape that doesn't match the flight state: a fully fanned tail on a bird in fast level flight, or a closed tail on a landing bird, reads as wrong even to viewers who can't articulate why.
- Uniform primary edges: draw each primary with a slightly different curvature and length. The longest primaries are usually in the middle of the primary group, not at the very tip.
- Inconsistent lighting: if the top of the wing is lit but the leading edge is also in shadow, the viewer's eye gets confused. Pick one light direction and apply it everywhere.
A practice routine that actually builds skill fast
The fastest way to get good at drawing birds in flight is a combination of gesture drawing and anatomy study, done in short, regular sessions rather than long occasional ones. Here's a routine that works for beginners through intermediates.
- Spend 5 minutes daily doing quick gesture sketches from reference: just the axis line, the body oval, and the wing V-shape. No detail. This trains your eye to read poses instantly.
- Once a week, do a dedicated wing anatomy study: find a clear reference of one wing position (downstroke, upstroke, or glide) and carefully map the shoulder, elbow, and wrist hinge points before drawing the wing silhouette.
- Every two weeks, do one fully rendered drawing from start to finish using the full workflow: thumbnail, body construction, wing position, tail/head/feet, feather layering, perspective, and shading.
- After each finished drawing, identify one specific error (wrong joint placement, inconsistent lighting, incorrect tail state) and do 3 to 5 quick sketches focused only on fixing that one thing.
- Rotate your reference species: draw a broad-winged hawk one week, a swallow the next, then a heron. Each species has a distinct wing shape and flight style, and drawing across species builds flexible understanding rather than muscle memory tied to one bird.
If you find yourself stuck on a specific problem, like wings that won't look three-dimensional or a body that always reads as flat, go back to the anatomy level. Look at how the wing bones map onto the silhouette, or study how feathers overlap in layers from a clear reference photo. The biology isn't separate from the drawing technique here. Understanding why a wing bends where it does, or why the tail fans out during braking, is exactly what tells you how to draw it convincingly. Artists who understand flight mechanics make better bird drawings than artists who only copy shapes, because they can construct a pose that doesn't exist in their reference library and still make it look right.
If you want to go deeper into the science behind what you're drawing, exploring topics like how different species describe their flight in words, or the biomechanics of what happens during a single wingbeat, will give your drawings an extra layer of grounded accuracy that viewers feel even if they can't name the reason.
FAQ
How do I choose which wing position to draw if my reference has birds mid-flap with messy angles?
Pick one clear moment (either full downstroke, mid-upstroke, or full glide) and treat the wingbeat frame as the closest match, then redraw the joints (shoulder, elbow, wrist) from that moment. If the reference is too blurred, choose the phase where the wingtip span is easiest to read, not the phase with the most feather detail.
What should I do if my bird looks like it is floating rather than flying through air?
Re-check the body axis tilt relative to the horizon, then force all other parts to align to it (head, wing arcs, tail wedge). Also confirm the chest volume reads as the thickest part and the body tapers toward the tail, because flat body shapes often create a hovering look.
My wings look like cartoon shapes, how can I make them feel three-dimensional?
Use the three hinge points as landmarks and draw an implied wing surface that changes across those landmarks, not a single smooth arc. Add a subtle stepped contour for the primary edges and shade the underside darker on the trailing side, this combination immediately sells depth and airflow.
How should I draw feather overlaps when the wing is flapping fast and feathers separate?
When wings are compact in an upstroke, simplify into larger blocks first (secondaries as a unified surface, primaries as segmented steps), then add only the most visible separations. Keep the coverts layered under the flight feathers so you preserve the direction of overlap even when individual feathers rotate.
What’s the easiest way to draw the tail during a turn or braking without getting it wrong?
Start from a fan shape, then tilt the entire fan in the direction of yaw or pitch implied by the body axis. For braking, increase fan openness and let the body tilt back, but still keep tail geometry convex and three-dimensional rather than a flat rectangle.
Should I draw legs and feet for every flying bird?
For most fast flight, tuck them, and you only need a small bump where they would sit under the belly or near the tail base. Only extend legs for slow flight, landing, or species that commonly trail legs, otherwise detailed feet usually make the pose feel stuck or incorrect.
How do I handle a bird seen from below or from an awkward camera angle?
Treat it as a construction problem first, use the body volume and the V-shape wing span to manage foreshortening, then place the wing hinges so they rotate correctly in perspective. Avoid copying the wing outline directly, instead redraw the wing’s internal logic (hinges and overlap) at the new viewpoint.
What’s a common mistake with the wing leading edge versus trailing edge?
Beginners often draw both edges as equally smooth curves. Use a tighter, cleaner curve on the leading edge to imply stiffness, and keep the trailing edge gently irregular and slightly softer, this reads as aerodynamic shape rather than a generic leaf outline.
How can I make my bird’s head and neck look connected during flight?
Build the neck as a smooth volume that joins the torso, do not place the head like a separate sphere on top. Align the beak with the direction of travel, and keep the head level with or slightly above the body axis unless the pose clearly shows climbing or braking.
If lighting is confusing, what shading rule should I rely on first?
Pick one light direction (usually above and slightly to the side for outdoor sun), then keep the upper wing surface lighter and the underside shadowed. Add a highlight along the leading edge, especially toward primary tips, and let trailing edges fall into softer shadow for motion.
How do I prevent over-detailing feather texture too early?
Stop at structure until the silhouette reads clearly: gesture, axis tilt, 3D body volume, wing hinges, tail fan, and big feather grouping. Only then add feather layers in the outward sequence (body contour, coverts, grouped secondaries, then primaries) so the details support form instead of distracting from it.
What practice routine helps most if I keep struggling with wing anatomy?
Do short sessions where you only draw the wing as three hinges (shoulder, elbow, wrist) plus the primary versus secondary read, using the same reference phase each time. If the rest of the bird is off, it is still better to nail the wing mechanics first, because they determine how the whole silhouette behaves.