
Start with a simple keyframe workflow: pose your bird at the four major wingbeat phases (downstroke start, mid-downstroke, upstroke start, mid-upstroke), make the body bob down on the downstroke and rise on the upstroke, then time the full cycle to around 0.2–0.5 seconds depending on your species. That alone gets you 80% of the way to a believable bird flying animation. If your bird flew away in the real world and you need to get it back, focus on keeping it calm, reducing stress, and using familiar cues to lure it closer flying animation. The remaining 20% is understanding the actual biomechanics well enough to fix what looks wrong, which this guide will walk you through step by step.
Bird Flying Animation Tutorial: Believable Motion from Basics
Marcus Chen
11 Jul 2026
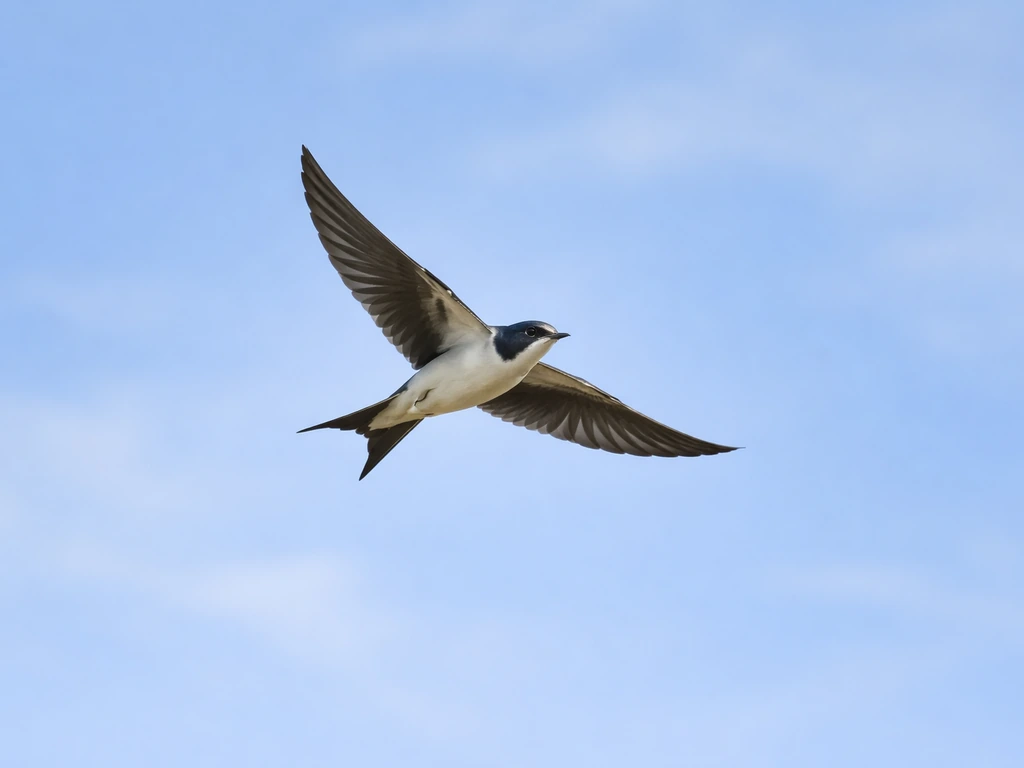
Realistic or stylized? Choose your target before you touch a keyframe
This choice shapes every decision downstream, so make it consciously. A realistic animation tries to match how a real bird actually flies, with accurate timing, anatomically correct joint behavior, and feather deformation that responds to aerodynamic forces. A stylized animation exaggerates those same mechanics for emotional effect: bigger wing arcs, slower motion, more dramatic body dips. Both are valid, and the biomechanics knowledge in this guide applies to both. Stylized work just means you are deliberately breaking the rules you understand.
Equally important is picking a reference species, because bird flight varies enormously. You can also use reference clips to nail unusual behaviors, like a bird flying on top of another bird. A hummingbird beats its wings 50 times per second in a nearly horizontal figure-eight. A Canada goose flaps at roughly 4 to 5 times per second in steady cruising flight. A red-tailed hawk can lock its wings and glide for minutes. These are not interchangeable. If you are just starting out, a medium-sized soaring bird like a crow or gull is the easiest target: the wingbeat is slow enough to study frame by frame, the stroke is deep and readable, and reference footage is easy to find.
| Goal | Best Starting Species | Wingbeat Rate | Key Challenge |
|---|---|---|---|
| Beginner realistic | Crow or gull | 3–5 Hz | Clean loop without pops |
| Stylized/cinematic | Eagle or pelican | 1–3 Hz | Slow timing that still reads as powered flight |
| High-energy action | Pigeon or starling | 5–8 Hz | Fast timing that doesn't smear into blur |
| Fantasy/creature | Any, exaggerated | Your choice | Believable physics-feel despite impossible scale |
Before animating anything, spend at least 30 minutes watching reference footage at 0.25x speed. Slow-motion bird flight footage is widely available and is genuinely the single most valuable research tool you have. Some animators also study how a bird fly bug looks in motion to get clearer wing timing and lift cues. Watch for where the wing changes direction, how the body moves relative to the wings, and how the wing folds on the upstroke. Everything you observe will directly map to something you can control in your animation software.
The wingbeat cycle and body bob: the foundation of everything
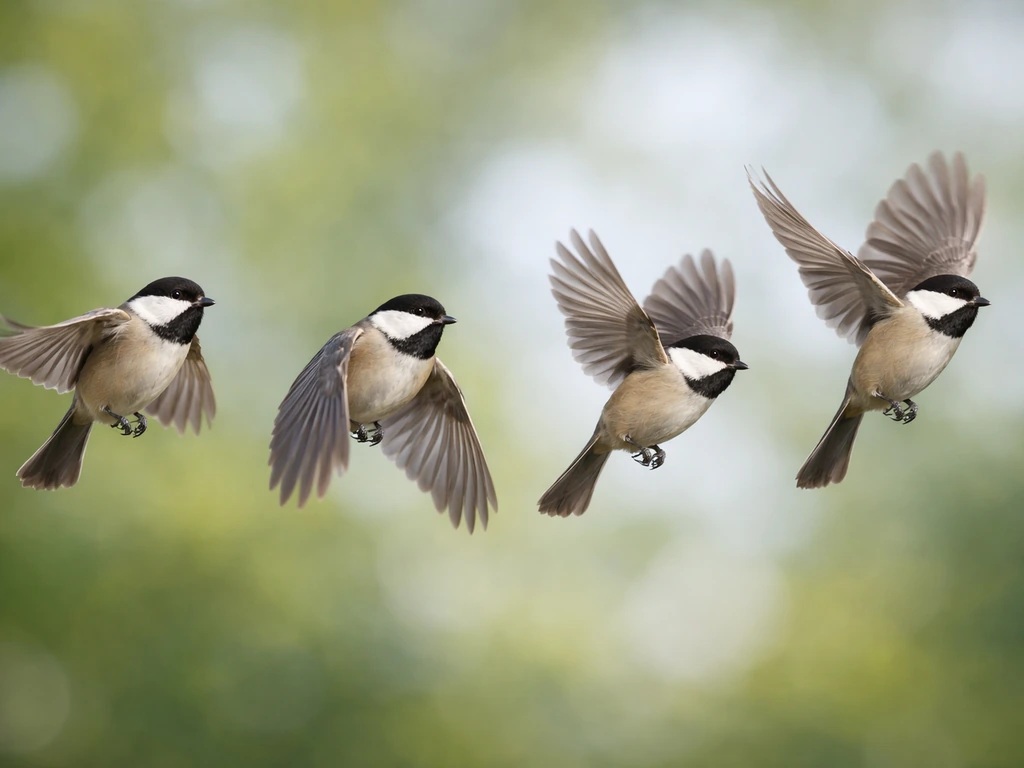
A bird's wingbeat is not just the wing going up and down. It is a coordinated whole-body event, and if you animate the wings independently from the body, your bird will look like a marionette. The key phases of the cycle are well-documented in kinematics research: phase 0 is the start of the downstroke (wings at their highest), phase 0.25 is mid-downstroke, phase 0.5 is the transition to upstroke (wings at their lowest), and phase 0.75 is mid-upstroke. Think of those four phases as your primary keyframes.
The body bob follows directly from the physics. The downstroke is when the pectoralis major muscle fires, driving the wing down and forward with force. This is when lift is generated and the body rises. The upstroke is a recovery stroke where, especially in slow flight, the wing is flexed and folded to reduce drag, and the body dips slightly. In fast cruising flight, the asymmetry is less dramatic, but it never disappears entirely. A bird's body at cruise looks like a very gentle sinusoidal wave moving through space, not a flat horizontal line.
The critical timing insight that fixes most bad bird animations: your wing rotation and your body translation must be in phase with each other, not keyframed independently. The body should be at its highest point just as the wing hits its lowest point (end of downstroke), and the wing should already be rotating back upward as the body starts to descend. If you key the body and the wings on completely separate timelines without checking their phase relationship, you will get the uncanny floating-marionette look that immediately reads as wrong.
Downstroke vs upstroke behavior
The downstroke and upstroke are not mirror images of each other, and this asymmetry is one of the biggest things beginner animators get wrong. During the downstroke, the wing is fully extended, leading with the wrist, sweeping down and forward with maximum surface area deployed. The aerodynamic forces during this phase are much greater than during the upstroke, which is why the body rises. During the upstroke in slow flight, birds fold the wing inward at the elbow and wrist to reduce surface area and drag, essentially tucking the wing on the return trip. Do not animate the upstroke as a simple mirror of the downstroke. The wing shape changes.
Wing anatomy translated into animation controls
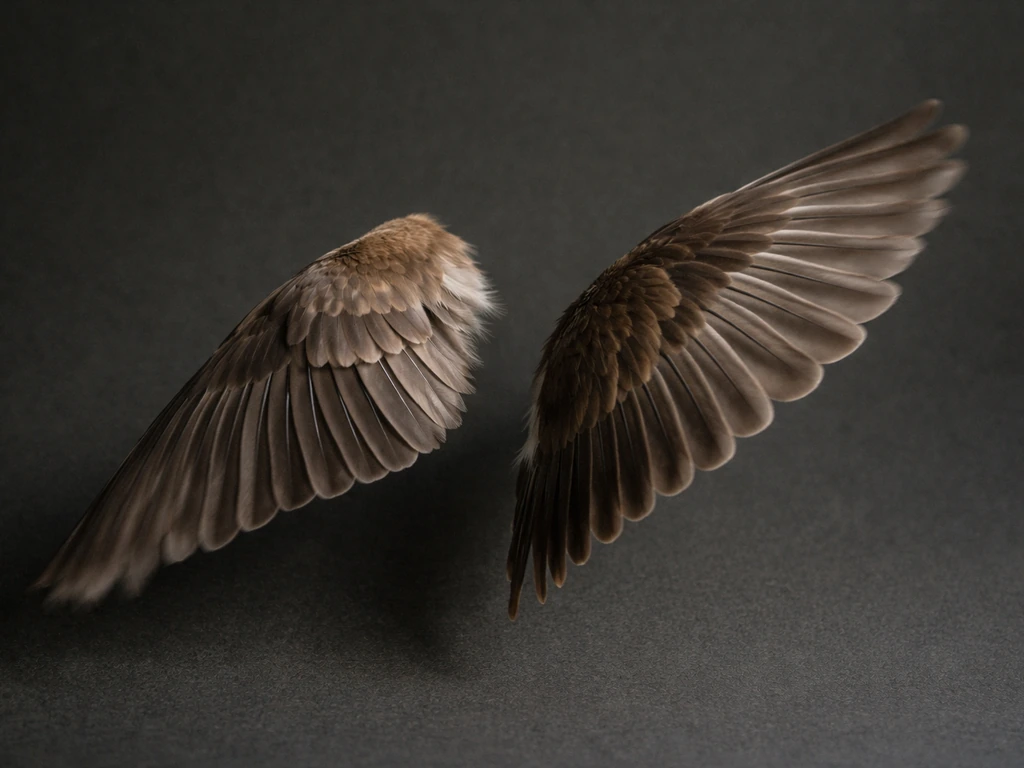
A bird wing is a modified arm. The shoulder connects to the upper arm (humerus), which connects to the forearm (radius and ulna), which connects to the hand and wrist region. The primary flight feathers extend from the hand, and the secondaries cover the forearm. When you build a wing rig or plan your keyframe poses, you are essentially animating a three-segment limb: upper arm, forearm, and hand, each with its own rotation behavior during the flap cycle.
The elbow and wrist do not move independently in real birds. Research on pigeon kinematics shows that elbow and wrist extension and flexion are mechanically coupled through the wing's skeletal structure, meaning when the elbow extends, the wrist tends to extend proportionally. This is a crucial animation principle: animate these joints as linked, not free. If you give your wrist control complete freedom and key it separately from the elbow, you will get anatomically impossible wing shapes. Either use a rig constraint that links them, or manually follow the coupling rule: extend both together, flex both together.
Feather spread is also directly tied to wing extension. When the wing is fully extended, the angle between individual feathers and the wing chord increases, fanning the primaries open for maximum surface area. When the wing flexes during the upstroke, the feathers align back toward the chord, compressing into a tighter package. You do not need to animate every feather individually to capture this. A single 'wing extension' control that drives both the joint angles and a feather spread parameter gets you most of the visual read.
Flapping amplitude by species type
Flapping amplitude (how far the wing travels from top to bottom) varies significantly by species and flight mode. Large soaring birds like eagles and condors have relatively shallow flap arcs during cruising flight but use deep, powerful strokes when climbing or taking off. Small passerines like sparrows and flycatchers use deep, fast strokes continuously because they have no aerodynamic reason to glide. As a working rule for medium-sized birds in level flight, aim for a wing arc of roughly 120 to 150 degrees total from highest to lowest position. Reduce that to 80 to 100 degrees for fast cruising. Go larger, up to 180 degrees, for takeoff or heavy climbing sequences.
Keyframing vs rig-driven animation: which workflow fits your project
Both approaches work. The choice depends on your software, your timeline, and how much reuse you need. Keyframe-only (pose-to-pose) is faster to set up and works in any software, including 2D tools. Rig-driven animation with FK or IK wing controls takes longer to set up but makes iteration much faster once it is running, especially if you are reusing the bird across many shots or need to change timing without re-posing every key.
Pose-to-pose keyframe workflow (2D and 3D)
- Set your timeline to represent one full wingbeat cycle. For a crow or gull at 4 Hz, that is about 6 to 7 frames at 24fps.
- Create four primary keyframes corresponding to the four phases: wings at highest (frame 1), mid-downstroke with wing leading edge angled down (frame 2–3), wings at lowest with full extension (frame 4), mid-upstroke with wing beginning to fold (frame 5–6).
- On the downstroke keys, lower the body slightly and tilt the body forward (nose down) to capture the forward momentum of the stroke.
- On the upstroke keys, raise the body slightly and allow a subtle nose-up pitch as the wing recovers.
- Check that the wrist/hand region leads the downstroke and the elbow leads the fold on the upstroke.
- Loop the cycle and watch it. Before adding any secondary motion, fix the phase relationship between the body bob and wing position.
- In 2D, draw the key poses as separate layers or frames, then add in-between drawings at the midpoints. In Grease Pencil or frame-by-frame 2D, easing your in-between timing so the motion slows briefly at the top and bottom of the wing arc gives the most natural feel.
FK rig workflow for 3D (tool-agnostic)
For a 3D bird rig, FK (forward kinematics) is often the better choice for wing flapping because you are controlling rotations directly, which maps cleanly to the four-phase cycle. Set up a three-bone chain for each wing: shoulder/upper arm, forearm, and hand. Add a mirror expression or constraint so the right wing drives the left wing with a matching phase (or a slight offset if you want asymmetry).
A marketed bird flight animation masterclass also emphasizes using demo rig patterns where wing controls mirror left and right for symmetric wing poses. In Blender, you can add an IK constraint in Pose Mode and use a short chain length to drive the tip of the wing, but for the basic flap cycle, keying FK rotations on the shoulder and forearm controls directly tends to give more predictable arcs.
In Maya, the IK/FK switching workflow lets you blend between IK for broad body-relative positioning and FK for the detailed flap rotations. For a pure flight cycle, most animators stay in FK mode for the wing chain and reserve IK for reach poses like landing. The key rigging rule, supported by research on wing kinematics, is that the elbow and wrist controls should be constrained or linked so they do not move fully independently. In practice, a simple expression that sets wrist extension as a proportion of elbow extension is enough to prevent anatomically impossible shapes.
For feather systems (available in tools like Houdini's feather rig or via custom setups in Blender and Maya), the primary feathers are typically attached to the hand/wrist-end of the wing chain. This means your hand bone rotation directly drives primary feather spread, and you should set it up that way intentionally rather than floating feather controls free from the skeleton. A clean production pattern is: animate the three core wing joints, drive feather spread from the hand extension value, and only add feather-specific secondary controls for hero shots that need extra detail.
2D-specific tips
In 2D animation, whether you are working in Blender's Grease Pencil, Toon Boom, or frame-by-frame software, the same four-phase structure applies. Draw the extreme poses first (wings highest and wings lowest), then add the mid-downstroke and mid-upstroke breakdowns before filling in in-betweens. Use your graph editor or timing chart to ease into and out of the extreme positions. A common trap in 2D bird cycles is giving equal spacing to every in-between frame, which produces a mechanical, robotic feel. The wing should move quickly through the middle of the stroke and slow briefly at the top and bottom of the arc.
Making it feel real: timing, drag, and aerodynamic cues
Once your basic cycle is working, the gap between 'technically correct' and 'visually convincing' comes down to three things: timing ratios, drag/inertia follow-through, and the visual cues that signal lift. None of these are complicated, but each one requires a deliberate choice.
Timing ratios: downstroke vs upstroke
The downstroke and upstroke do not take equal time. In most birds during powered flight, the downstroke is slightly slower and more sustained than the upstroke, which tends to be quicker. Think of it like a hammer: the powered stroke is controlled and deliberate, and the recovery is snapped back. A useful starting ratio for a medium-sized bird is roughly 55 to 60 percent of the cycle on the downstroke and 40 to 45 percent on the upstroke. You can shift this ratio to change the feel: a heavier, more labored flap gets a longer downstroke, while a snappy, agile bird gets a more even split.
Drag and follow-through on the wing tip
The wing tip (the outermost primaries, driven by the hand bone) should always lag slightly behind the rest of the wing. On the downstroke, the tip trails the leading edge. On the upstroke, when the wing folds, the tip is the last part to come up. This follow-through is not a complex simulation; it is just a small timing offset on your hand/wrist control relative to the shoulder rotation. In keyframe terms, offset the hand's extreme keyframes by 1 to 2 frames later than the shoulder's extremes. That single adjustment adds more visual believability than almost anything else.
Banking and turning
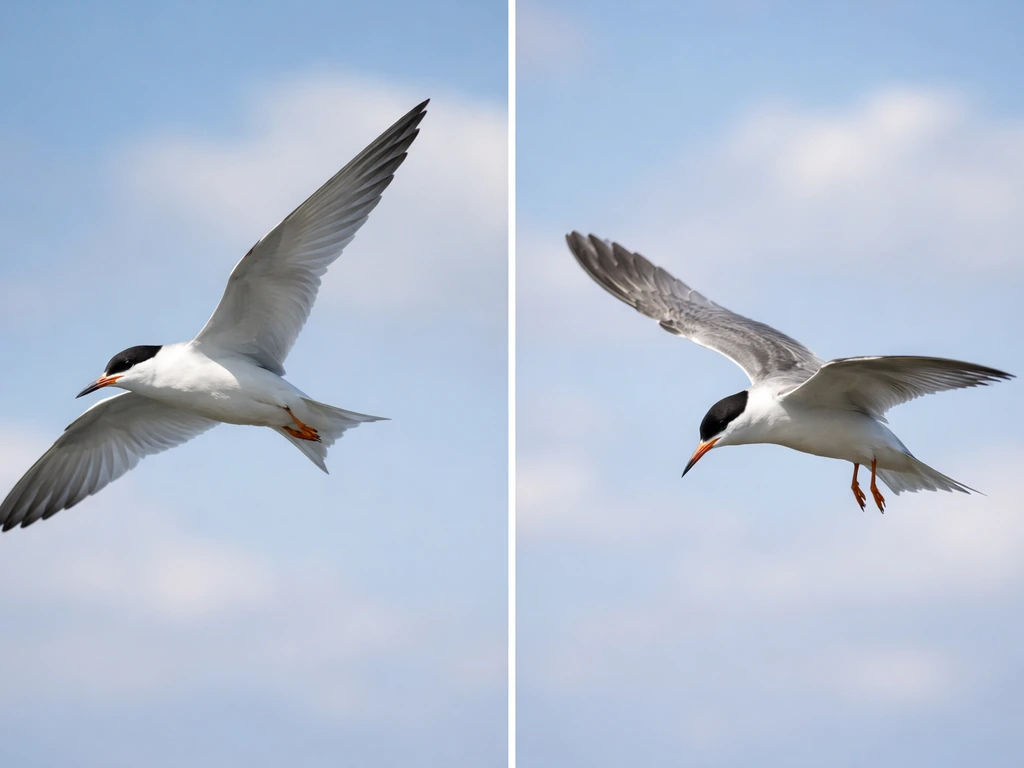
Birds turn by banking, using asymmetric lift between wings, similar to how an aircraft initiates a turn.
To animate a turn, roll the body in the direction of the turn and make the inside wing shorten its stroke slightly (less extension, less arc) while the outside wing continues its full stroke. The body also pitches nose-up very slightly during the roll-in to maintain altitude. You do not need to simulate the aerodynamics to capture this: the visual read is body roll plus wing asymmetry plus a subtle yaw of the head and body toward the turn direction.
Keep the turn gradual unless you are animating an aggressive maneuver. Most bird turns happen over several full wingbeat cycles, not in a single stroke.
Lift cues: what 'flying' looks like vs 'falling'
One of the most common failures in bird animation is that the bird looks like it is falling and flapping rather than being actively supported by the air. The fix is to make the body translation correspond to the aerodynamic event. On each downstroke, the body should translate slightly upward or at least resist downward movement. The forward movement should accelerate slightly on the downstroke and ease off on the upstroke. This gives a subtle surging quality to the forward path, which is exactly what you see in real bird flight footage. A perfectly horizontal, perfectly smooth flight path reads as a slow-moving ball with wings attached.
Polish, loops, and fixing what's broken
Looping without pops
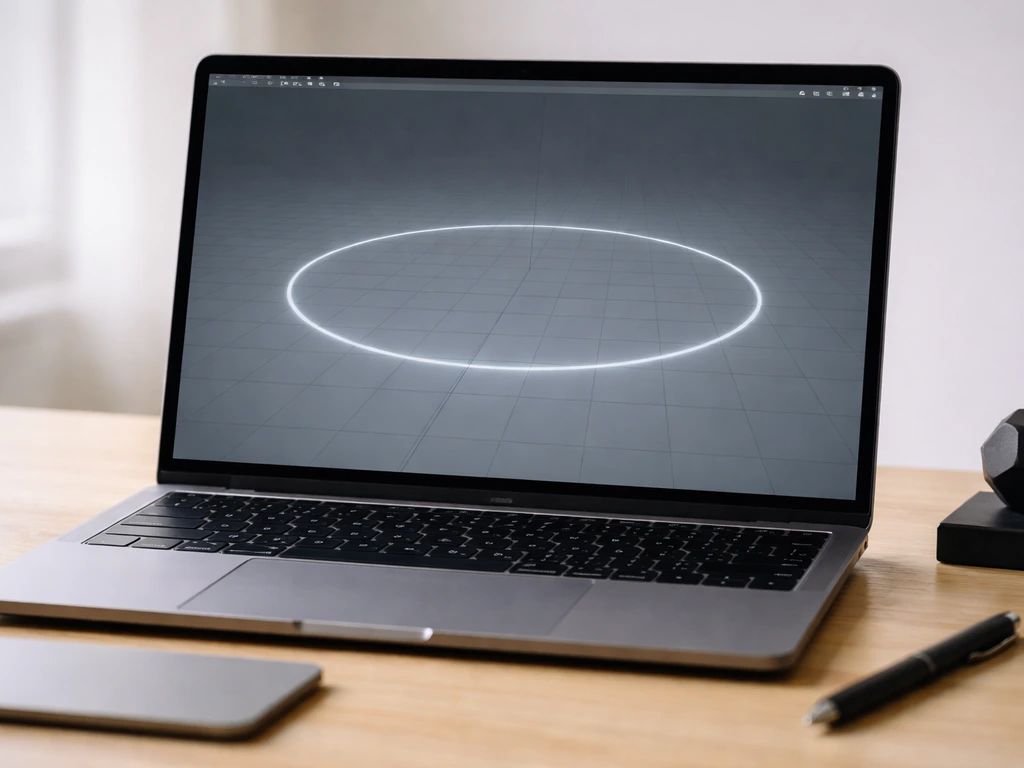
A clean loop is the hardest part of a flight cycle. The most common cause of a pop at the loop point is an easing mismatch: the last keyframe eases out with a different curve than the first keyframe eases in, so the motion lurches when the cycle repeats. To fix this, open your graph editor and make sure the curve tangents at the first and last keyframes are identical.
In most 3D software, setting a 'cycle with offset' or 'loop' modifier on the curves and then manually smoothing the boundary tangents is the reliable method. In 2D, check that your last in-between frame before the loop point has the same spacing ratio as your first in-between frame after the loop start.
A mirrored-wing expression or constraint also helps dramatically with loop pops: if the left and right wings are driven by a single control with a mirror relationship rather than two independently keyed sets of channels, you eliminate the chance of left/right timing drift accumulating over the loop. This is a standard production approach and worth setting up even for simple rigs.
Camera choices for flight shots
The camera angle dramatically changes what is readable in a flight animation. A straight side view shows the wing arc most clearly and is the easiest angle for troubleshooting. A top-down or three-quarter view from above is great for showing wing spread and turning behavior (and connects to what bird watchers and naturalists actually see, which makes it feel grounded). A low-angle shot from below, looking up at the bird against the sky, emphasizes scale and lift. For cinematic shots, a camera that holds on a loose follow from slightly behind and below, with a gentle drift rather than locked-off tracking, tends to feel most natural and avoids the floaty locked-cam look.
Common mistakes and how to fix them
| Mistake | What it looks like | Fix |
|---|---|---|
| Wings and body out of phase | Bird bobs randomly, wings seem disconnected from body motion | Sync body-high with wing-low; check phase offset in graph editor |
| Symmetric upstroke/downstroke | Wing looks like a paddle, no aerodynamic weight | Shorten upstroke timing; fold wing (flex elbow/wrist) on upstroke |
| Fully extended wing on upstroke | Wing looks stiff and board-like on recovery | Reduce elbow and wrist extension by 40–60% during upstroke phase |
| No wing tip follow-through | Wing moves as a rigid unit, no fluid quality | Offset hand/tip keyframes 1–2 frames later than shoulder |
| Pop at loop point | Jerk or snap when cycle repeats | Match curve tangents at loop boundary; use cycle modifier |
| Flat horizontal flight path | Bird looks pasted onto the background | Add sinusoidal vertical oscillation tied to wingbeat phase |
| Identical left/right wing timing | Subtle mechanical symmetry that reads as artificial | Add 1-frame offset or 5–10% amplitude difference between wings |
Iteration strategy: what to fix first
When you are iterating, fix problems in order of visual priority. Start with the phase relationship between the wings and body: if that is wrong, nothing else matters. Then check the downstroke/upstroke asymmetry. Then the wing tip follow-through. Then the loop. Leave feather detail, secondary motion, and camera polish for last. The reason is that a beautifully detailed feather system on a mechanically broken flight cycle still reads as wrong, and you will have wasted time on detail that is invisible until the foundation is solid.
If you want to go deeper on the visual science behind what you are animating, the biomechanics of bird flight have a lot more to offer. Understanding how different species adapt their wing shape for different flight speeds, or the geometry of how a bird's wing functions differently when viewed from above versus from the side, gives you better intuition for what 'right' looks like when you are troubleshooting. For example, studying a top view of bird flying helps you judge wing orientation and spacing from a different perspective, not just side-on motion. That kind of observational literacy is ultimately what separates an animator who can fake it from one who genuinely understands what they are recreating.
FAQ
How do I choose the right wingbeat speed (cycle length) if my reference clip looks fast or slow?
Match speed to the species and motion context, not the clip playback. If the bird is perched or gliding, the wingbeat may be sparse, so use the strongest powered-flap moments to set your cycle. A practical check is to measure how many wing cycles happen while the body travels a known distance in the clip (even roughly), then scale your 0.2 to 0.5 second range until the forward surging speed feels consistent.
My bird looks robotic even though the four key phases are correct, what else should I adjust?
Phase coverage alone can still feel mechanical if easing and drag cues are missing. Speed up the transition through mid-downstroke and mid-upstroke, then add a brief slowdown at the top and bottom extremes. Also verify that forward translation accelerates on downstroke and eases on upstroke, not just that the wings move.
Should I animate lift by moving the whole body up and down, or can I fake it with rotations?
Do both, but keep the body translation tied to the powered event. Translation handles the “supported by air” read, while body rotation (slight pitch changes) sells momentum and altitude control. If you rely only on rotation, the motion often reads as flopping, not flying, because the bird’s contact with air lacks the vertical surge behavior.
How can I tell if my wing rotation is in phase with body movement without constant visual guessing?
Use a timing test: mark the frames where the wing hits its highest and lowest points, then check that your body peaks and dips align with those same frames. If your software supports it, graph-editor compare the wing control curve and the body translation curve for correspondence in keyframe timing, then only fine-tune with offsets after the alignment is correct.
Do I need to animate wing folding and feather spread separately from the main wing cycle?
Not at first. Start by driving feather spread from a single wing extension or hand extension parameter, so the feather packaging compresses during the upstroke automatically. Save separate feather motion for hero angles, and keep it low amplitude so it does not contradict the wing’s extension timing.
Why does my mirrored wing sometimes break during looping even if I mirror the setup?
A common cause is keyframes or curve modifiers being applied differently per side, which creates tiny phase drift at the loop boundary. Ensure both wings are truly driven by one mirrored control, or if they are separate, copy the entire curve data (including tangent modes and loop settings) rather than re-keying. Then confirm the boundary tangents match on the shared driver channels.
What’s a safe starting wing arc for a loopable cycle, and how do I avoid over-rotation artifacts?
Use a moderate arc first (about 120 to 150 degrees for level flight on medium birds) and focus on readability from side view. After you lock the loop, only then expand amplitude. Over-rotating early can create a loop boundary mismatch, because your easing and follow-through offsets get harder to balance when the extremes are further apart.
How do I handle slow-motion flight, where the upstroke looks more like a controlled glide recovery?
In slow or near-hover conditions, emphasize wing flex and tighter upstroke folding, and keep the body bob more sinusoidal rather than sharply bobbing each stroke. Also expect asymmetry to be less dramatic than in fast flapping, so check that the downstroke is still the powered, lift-generating moment, not equalized by making both strokes identical.
My bird turns but still looks like it is sliding sideways, how do I fix the body’s relation to the turn?
Banking should come with a slight roll and a subtle orientation change toward the turn direction. Keep the inside wing shortening the stroke while the outside wing maintains full extension, then add a gentle yaw of head and body. If it still slides, reduce the forward translation during the roll-in for that first fraction of the cycle, then let it recover as the turn stabilizes.
What are the most common “first fixes” when the animation feels wrong after everything is keyed?
Check in this order: wing-body phase alignment, downstroke versus upstroke asymmetry, wing tip follow-through timing (tip lags by a small offset), then loop boundary tangents. Only after those are solid should you touch feather detail and secondary motion, because detail can hide or worsen a timing problem by distracting from the aerodynamic read.
How do I avoid a loop pop when my cycle is driven by constraints or expressions instead of raw keyframes?
Treat the loop boundary as a constraint compatibility problem. Make sure any procedural driver (mirror expressions, linked joints, or cycle modifiers) uses identical phase input at the start and end frames. If your driver is based on time, confirm the time wrap is consistent at the loop point, then smooth boundary tangents on the final evaluated transform curves if your tool allows it.
Can I reuse one bird’s flight cycle for another bird without remaking all key poses?
You can reuse timing as a starting point, but you usually need to remap amplitude and joint proportions. If the new bird is larger or has different wing anatomy, adjust wing arc and the elbow-wrist coupling behavior (linked extension, not independent). Also re-check species-specific stroke frequency, because a “copied cycle” can look floaty if the downstroke duration does not match the new flight mode.
In 2D cycles, how do I prevent the “equal spacing” look without redrawing every pose?
Keep extremes at the same positions, but change the in-between pacing using fewer keyframes plus spacing control. Put fewer frames around mid-stroke transitions and more around top and bottom extremes, then check motion timing in your graph or timing chart equivalent. The goal is non-uniform speed, not just non-uniform drawing.
Next Articles
Bird Flew Away: How to Get It Back Safely and Fast
Step-by-step plan to retrieve a bird safely, from first minutes and calm calling to humane coaxing and prevention tips.
Bird Flying Top View: How to Draw, Model, and Get PNGs
Learn biomechanics-based tips to draw and model a bird flying top view, plus find or export transparent PNGs safely.
Bird Has Flown Meaning: Definition and How to Respond
Understand the bird has flown meaning, when it’s used, and how to reply with examples for real-life conversations.