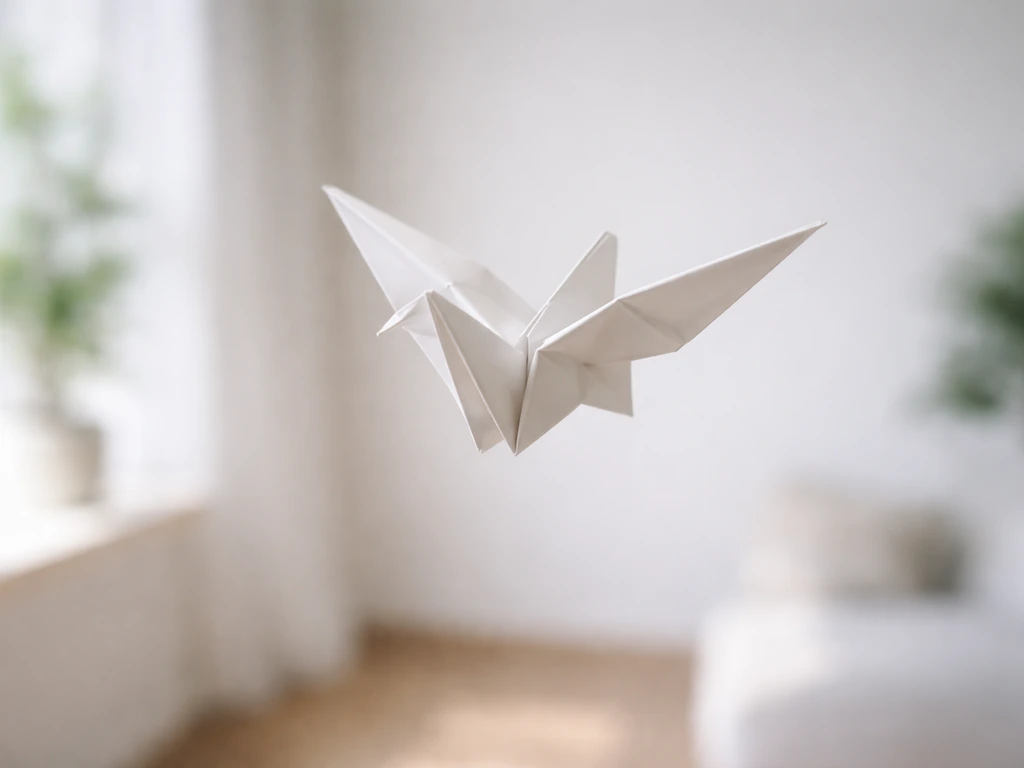
The easiest origami bird that actually flies is the classic flapping bird, which you can fold from a single square of standard origami paper in about ten minutes. Hold it by the body, pull the tail, and the wings flap. If you want something that glides through the air when you toss it, a slight modification of the same base into a low-wing glider shape works better. If you want a paper toy that can fly like a bird in a more natural glide, use the toss-glider modification described next. Either way, the paper you choose, the sharpness of your creases, and how you tune the wings after folding matter just as much as the folding steps themselves.
Origami Bird That Can Fly Easy: Step-by-Step Guide

Marcus Chen
1 Jul 2026
What 'can fly' actually means for an origami bird
Before you fold anything, it helps to know which kind of 'flying' you are after, because the two most popular origami birds fly in completely different ways and require slightly different approaches.
The first is the flapping bird, which is an action model. Gilad’s Origami database listing for “Origami in Action” categorizes flapping bird toys as blank" rel="noopener noreferrer">action models, including birds with flapping wings. You supply the energy by hand: hold the body just below the neck, tug the tail gently in a steady rhythm, and the wings beat up and down. blank" rel="noopener noreferrer">This is kinetic origami, not aerodynamic flight. The wings are not generating lift; you are moving them mechanically. It looks like flight, it mimics the motion beautifully, and it is deeply satisfying, but it only 'flies' while you are holding it.
The second is a toss-glider. You throw it like a paper airplane and it glides forward on wing lift before landing. If you want a different kind of motion, the toss-glider approach is a related alternative to this flapping setup: you throw it and it glides on wing lift. Some origami bird shapes do this naturally; others need their wing angles tweaked. This article covers both, starting with the flapping bird because it is the most iconic and genuinely the easiest to pull off on a first attempt.
There is also a hybrid approach worth knowing about: fold a flapping bird, then angle the wings slightly downward (dihedral) and give it a smooth underhand toss. With the right paper and tight creases, it will glide a short distance before settling. It will not soar across a room, but it bridges both worlds nicely.
Paper choice makes or breaks it
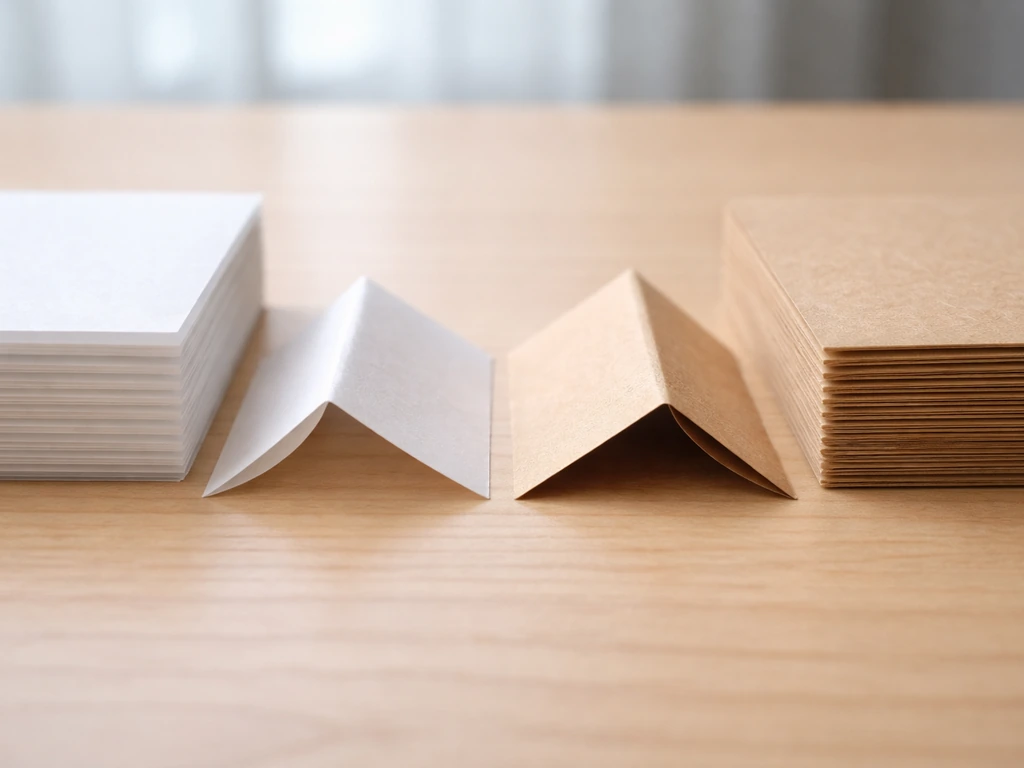
Paper selection is the single most overlooked variable for beginners. The wrong paper produces a model that either refuses to flap or collapses on the first toss.
For the flapping bird, you want thin, crisp origami paper, ideally the standard kami paper sold in 15 cm (about 6 inch) squares. This paper is light enough to respond to the tail-tug mechanism without the creases fighting you. Cardstock and heavier craft paper are too stiff for the flapping action: the hinge points in the wings cannot flex freely, and the model just sits there when you pull the tail. Printer paper (80 gsm) is borderline; it works in a pinch but tends to tear at the crease points after a few dozen flaps.
For a toss-glider version, slightly heavier paper actually helps. A 21 cm square of standard copy paper (90 gsm) gives the wings enough stiffness to hold their shape during launch and enough weight distribution to keep the nose from pitching up uncontrollably. Think of it this way: a heavier, stiffer wing resists deforming when air pushes against it, which is the same reason a soaring hawk has relatively rigid primary feathers compared to the soft down closer to its body.
| Paper type | Weight (approx. gsm) | Best for | Avoid if... |
|---|---|---|---|
| Standard kami origami paper | 60–70 gsm | Flapping action bird | You want long glides |
| Printer/copy paper (A4 or letter) | 80–90 gsm | Toss-glider or hybrid | You need precise folds on tiny models |
| Tissue foil (washi/foil laminate) | 30–50 gsm | Detail folding, light flapping | You are a beginner (slippery, unforgiving) |
| Cardstock | 160+ gsm | Decorative display models | You want any wing movement at all |
One practical shortcut: take a standard sheet of printer paper and cut it into the largest square you can. For an A4 sheet that is a 21 cm square. That single sheet, folded carefully, produces a flapping bird that also glides reasonably well, costs nothing, and is available anywhere.
Step-by-step folds for the classic flying origami bird
This sequence builds the traditional flapping bird from a single square sheet. Work on a hard, flat surface and crease every fold firmly by running a fingernail along the line. Soft creases are the number one reason the wing-flap mechanism fails.
- Start color-side down. Fold the square in half diagonally both ways, then unfold. Fold in half horizontally and vertically, then unfold. You now have eight crease lines radiating from the center.
- Collapse the square into a smaller square by pushing the two side corners inward along the existing creases. You should end up with a flat 'preliminary base' with four flaps: two on the left and two on the right.
- Rotate the base so the open (multiple-flap) end points down. Fold the left and right raw edges of the top layer in to meet the vertical center crease. Fold the top triangle down over them to crease it, then unfold all three folds.
- Lift the bottom corner of the top layer only and fold it upward, opening the two side flaps outward as you do. This is the 'petal fold.' Press it flat. Flip the model over and repeat steps 3 and 4 on the other side.
- You now have a narrow diamond with four long points. Take the two innermost lower points and fold them outward and upward, one to each side. These become the neck/head and the tail. Crease sharply.
- Pull the neck point gently outward and crimp it downward to form the head. A small inside-reverse fold at the tip makes a beak.
- Gently pull the two wings (the wide outer panels) apart from each other. The body will open slightly. This pre-tensions the hinge and lets the flapping mechanism work.
- To fly: hold the body (not the wings) firmly between thumb and index finger just forward of the center. Use your other hand to pull the tail gently downward and release in a rhythmic motion. The wings rise and fall.
The entire sequence takes most beginners about 10 to 15 minutes on a first attempt and under 5 minutes once practiced. If the wings do not flap, the most common culprit is a crease that was not pressed flat in step 3 or 4. Unfold back to the petal fold, re-crease firmly, and reassemble.
Tuning wing shape, balance, and throw angle
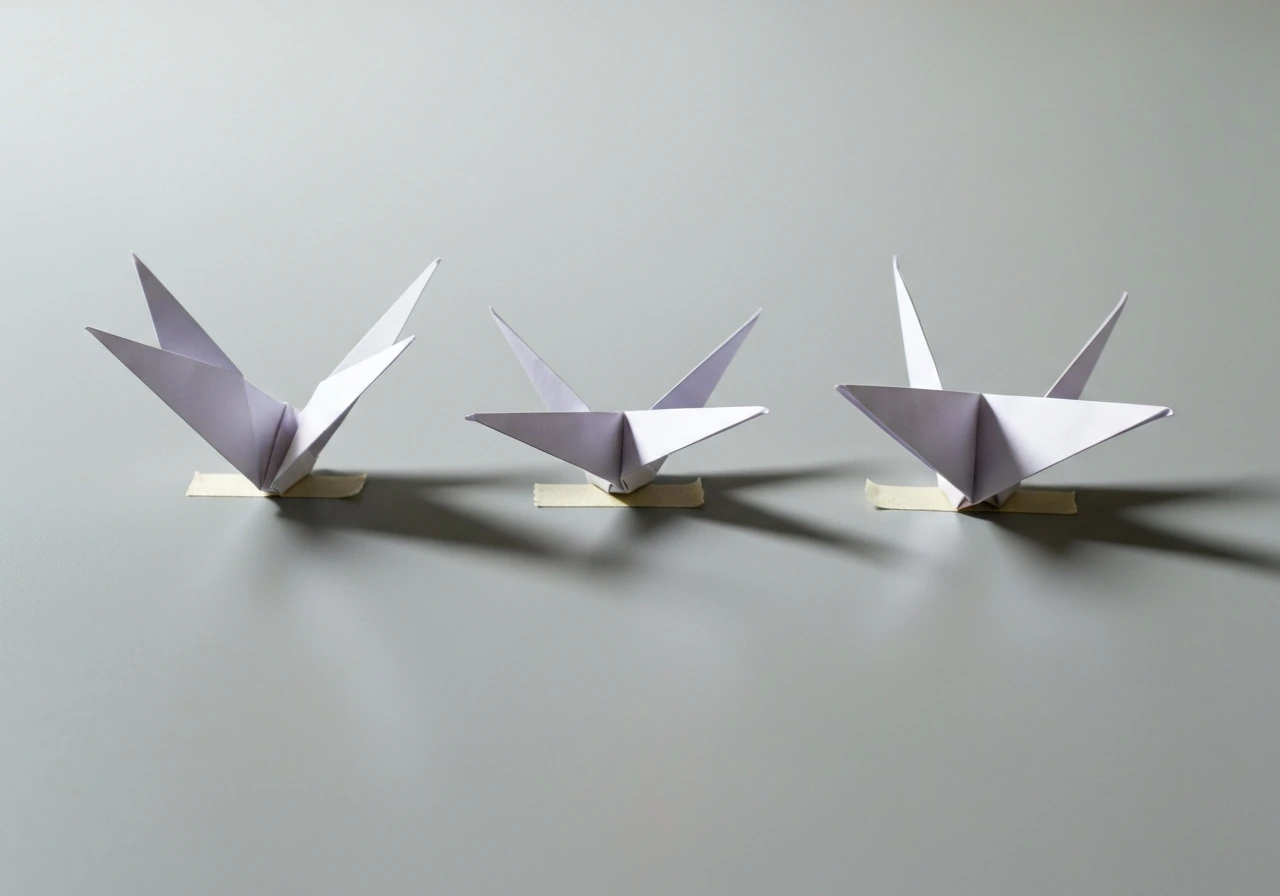
Once the basic bird is folded, small adjustments have outsized effects on how well it performs. This is the part most tutorials skip, and it is where the real satisfaction lives.
Wing dihedral (the upward V-angle)
Dihedral is the upward angle of the wings relative to the body. A slight dihedral, where the wingtips sit a little higher than the root of each wing, dramatically improves roll stability. When you toss the bird and it starts to tip sideways, dihedral automatically creates more lift on the lower wing and corrects the roll, much the same way a seagull spreads and tilts its wings to stabilize in a crosswind. For the origami bird, gently curve each wing panel upward about 10 to 15 degrees by running it over a rounded edge like a pen barrel.
Camber (the curve of the wing surface)
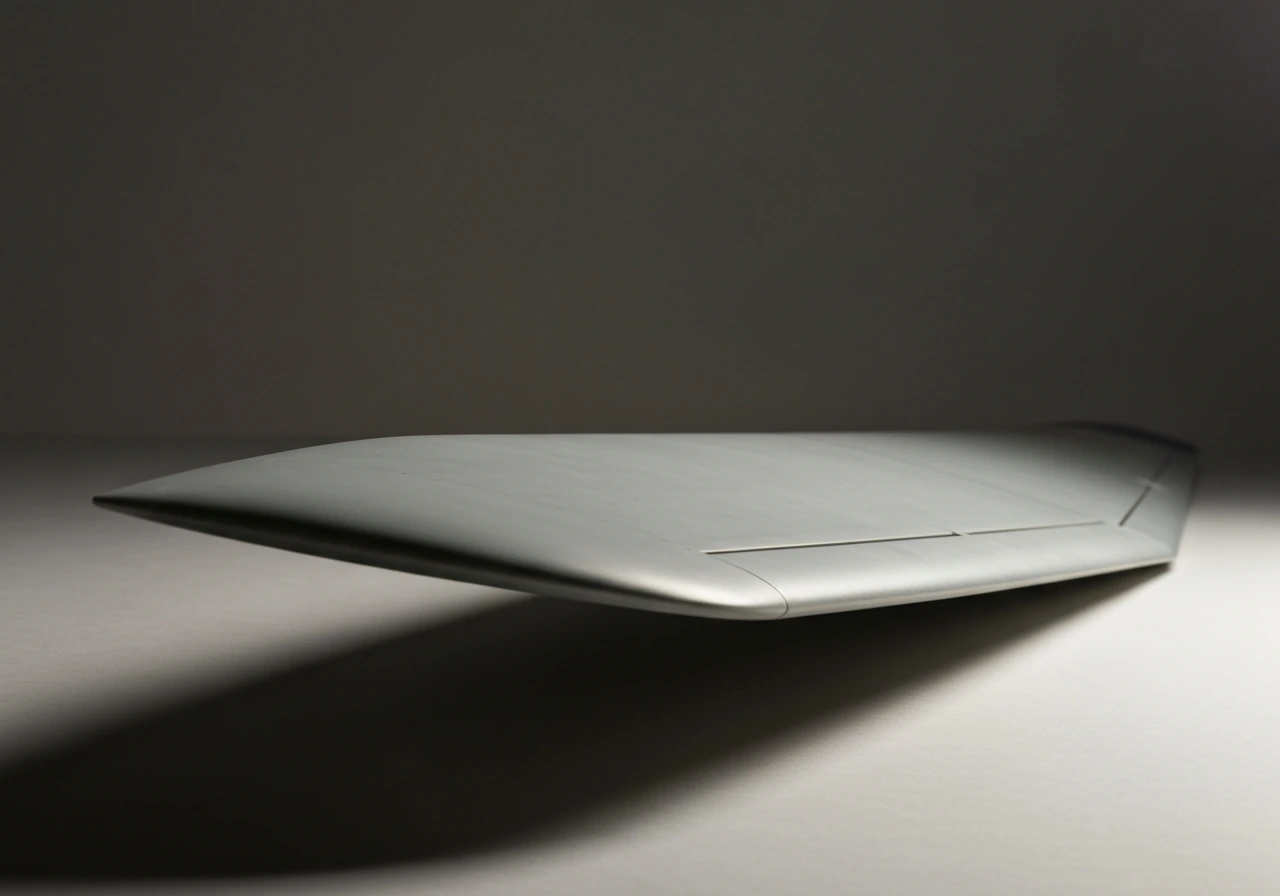
Camber is the gentle curve from front to back across a wing. A flat wing generates less lift than a slightly arched one, which is exactly why bird wings are not flat boards. For a paper glider bird, introduce a slight arch by pressing your thumbs along the underside of each wing and curling it very gently upward toward the leading edge. You are not folding; you are shaping. Even a few millimeters of camber changes the airflow over the top surface, lowering pressure there and pulling the wing upward more effectively during a glide.
Center of gravity and balance
For a gliding toss, the center of gravity (the point where the model balances fore and aft) should sit roughly one-third of the way back from the nose. If the bird noses up sharply and stalls immediately after release, it is tail-heavy: add a small paper clip to the beak or crimp the nose fold tighter to add weight forward. If it dives nose-first, it is nose-heavy: slightly unfold the bottom layers of the body to reduce front mass, or gently bend the trailing edges of the wings upward by about 3 to 5 mm to act as elevators.
Throw angle
The launch angle for an origami bird glider is shallower than most people expect. Aim for about 5 to 10 degrees above horizontal and use a smooth, level push rather than an overhand throw. Think of how you would place a book on a shelf, with a forward glide of the arm rather than a snap. Throwing too hard or too steeply is the most common reason a first toss immediately nosedives or pitches up and stalls.
How to actually launch and test it today

Indoor testing is easiest for getting consistent feedback. Find a space at least 3 to 4 meters long with no breeze, because even a ceiling fan will dominate the flight of a light paper model. Hold the bird loosely between two fingers at the balance point, tilt it very slightly nose-down, and give it a smooth, firm forward push at elbow height.
Watch what happens and diagnose from there. A short, graceful downward glide that travels 2 to 4 meters before settling gently is a success for an indoor paper bird. With practice, that same indoor paper bird can also be tuned to behave like a paper bird that can fly in a more realistic, sustained way. A sharp nosedive within half a meter means add weight forward or reduce dihedral slightly. A sudden climb followed by a stall and drop means too much dihedral or the center of gravity is too far back.
For the flapping version specifically, take it outside on a calm day and try walking briskly while holding it extended in front of you at arm's length. The forward motion of your walk gives the tail-tug mechanism a little air assistance and makes the wing beat look remarkably convincing, especially to anyone watching from the side. This is genuinely the closest you will get to 'flying' the model rather than just operating it. If you want the best flying plane like bird, focus on the toss-glider setup and tune the wing dihedral and camber for stable glide.
A practical testing loop: toss, observe the failure mode, make one adjustment at a time (never two at once), toss again. Most birds reach an acceptable glide in three to five adjustment cycles. Keep a scrap of tape handy for adding nose weight incrementally, because small changes in mass distribution at the nose make a large difference in glide angle.
Common failure modes and quick fixes
- Wings will not flap: re-crease the petal folds, then gently stretch the wing panels apart to loosen the hinge.
- Glider dives immediately: add a small paper clip or fold a sliver of tape onto the nose.
- Glider climbs and stalls: bend the trailing edges of both wings up slightly (elevator effect) or remove any nose weight.
- Bird rolls to one side: compare left and right wing dihedral angles and adjust the lower wing upward to match.
- Creases tearing after a few uses: the paper is too thin or too dry; switch to slightly heavier stock or humidify the paper briefly before folding.
Why the fold choices connect to real bird-flight science
This is where origami becomes genuinely interesting from a biomechanics standpoint, and it is worth spending a moment on because understanding the 'why' makes you a better folder.
The dihedral angle you bend into the wings mirrors what you see in broad-winged soaring birds like turkey vultures and red-tailed hawks. Both species hold their wings in a shallow V during thermal soaring. That angle is not random: it creates an automatic pendulum-like stability so the bird does not have to constantly fire corrective muscles to stay level. Your paper bird benefits from exactly the same passive stability mechanism.
The camber you introduce by arching the wing surface replicates the cross-sectional profile of a bird's wing feathers, which are not flat but curved from front to back. That curvature accelerates airflow over the top surface, lowering pressure above the wing relative to below it, generating lift. Even a paper wing bends this principle to its advantage: researchers studying flexible membrane wings confirm that even small changes in camber significantly shift aerodynamic performance, which is why that gentle thumb-press curve you give the paper wing actually matters.
The center-of-gravity rule (one-third back from the leading edge) is the same principle governing where a bird's wing generates most of its lift, roughly one-quarter to one-third back from the leading edge in most species. Positioning mass there aligns the gravitational pull with the lift vector, producing stable, non-pitching flight. Move the mass too far aft in a bird or a paper model and you get the same result: a pitch-up stall.
The flapping mechanism itself, pulling a tail to drive wing motion through a series of hinged creases, is a simplified analog to how flight muscles in birds transmit force through the wing skeleton. The paper creases act as flexible joints, just as a bird's wrist and elbow joints transmit the power stroke of the pectoralis muscle outward to the primary feathers. The design is not just decorative cleverness; it is a functional mechanical chain.
If you find the connection between paper folding and real wing mechanics fascinating, it extends further than you might expect. Engineers studying micro air vehicles have borrowed origami fold patterns to build wings that can morph their camber and span mid-flight, inspired by how birds like swifts sweep their wings back at high speed and spread them wide for slow soaring. The origami bird on your desk is, in a small but genuine way, a working model of some of the most sophisticated aerodynamics in nature.
There are many paths from here worth exploring: other paper toys designed specifically to mimic bird gliding patterns, the science of why certain bird wing shapes produce dramatically different flight styles, and designs that push further into the space between origami art and functional aircraft. The flapping bird you just folded is a good first step into all of it.
FAQ
Can I make the origami bird that can fly easy using non-square paper or a rectangle?
Yes, but square shape matters for symmetry. Start by trimming to the largest square you can, then fold only after you have a true square. If you cannot trim, use the rectangle but expect uneven wing sizes, which usually causes one wing to flap harder (or one glider side to dive).
My flapping bird won’t flap even after I press the creases, what should I check first?
Confirm the tail-tug connects to the wing hinge points. If the wings feel “stiff,” re-crease the wing folds by unfolding back to the main petal fold and reassembling with harder pressure. Also make sure you are pulling the tail gently but steadily, not yanking hard (a jerk can make the hinge twist instead of flex).
How do I tune the toss-glider when it veers left or right consistently?
Adjust wing symmetry. If it consistently turns right, slightly lower the left wing tip relative to the right by a millimeter or two, or remove dihedral from the higher wing by very gently pressing it flatter. Re-test after one change only, because small angle changes can amplify turning quickly.
What’s the best way to add or remove nose weight for a gliding origami bird?
Use tiny, incremental additions at the beak point (for example, small tape bits or a very light paper clip). Add the smallest amount you can, then test. If you overshoot and it becomes tail-heavy, undo some weight before changing dihedral, since mass distribution usually has a stronger effect on pitch than wing curvature.
My glider pitches up and stalls right after release. What’s the fastest fix?
Treat it as tail-heavy first. Add a little forward mass to the beak, or crimp the nose fold a touch tighter to shift weight forward. If it still stalls, reduce dihedral slightly by bending each wing closer to the body (less “V” shape), then test again.
It dives nose-first every time. Should I change paper, or can I fix it by tuning?
You can usually fix it without changing paper. Lighten the nose by reducing front bulk (slightly unfold bottom body layers), and/or act as elevators by bending the trailing edges upward about 3 to 5 mm. If the dive persists, your center of gravity is likely too far forward, so avoid adding nose weight in future adjustments.
How far back should I hold or release the origami bird for the most consistent glide indoors?
Hold it at the balance point and give a level, forward push from elbow height. Avoid throwing from behind your body, because it changes the effective launch angle. A good indoor test is a smooth release with the bird facing forward, then observe whether it settles or immediately climbs or dives.
Do I need perfect wind-free conditions, and how can I test safely indoors?
Wind matters a lot for light models. Use a long, clear space (at least a few meters), and eliminate airflow sources like ceiling fans, open doors, and HVAC drafts. If you cannot remove airflow, test in shorter runs and prioritize diagnosing the main failure mode (nosedive, stall, or turning) rather than chasing distance.
Will thicker paper still work for an origami bird that can fly easy, especially flapping models?
Thicker paper usually hurts flapping because wing hinges do not flex as freely. If you want to use heavier paper, start with the toss-glider version instead of the flapping one, and expect the glider to behave more predictably than the flapper. If you insist on flapping, use thinner sides where hinges fold, or press creases very sharply to help flexibility.
How can I improve results if my wings look “warped” after folding?
Re-shape with gentle controlled curves. For dihedral, curve wingtips upward consistently using a rounded edge, and for camber, use thumbs to introduce a subtle arch from front to back without creating sharp bends. Avoid creasing again in different places after the main fold, because extra fold lines can create turbulence and uneven lift.
Next Article
Paper Bird That Can Fly: Origami Model Guide and Fixes
Step-by-step guide to fold a paper bird that can fly farther, with fixes for glide, stability, and common failure causes
