A paper bird that can actually fly is not a myth, but it does require you to be honest about what 'fly' means here. Fold one right, launch it correctly, and you can get a smooth, stable glide of 5 to 10 meters from a shoulder-height throw. That is genuinely farther and more graceful than most paper airplanes. What you will not get is a bird that flaps its wings and stays airborne indefinitely. Understanding that distinction up front saves a lot of frustration and actually makes the build more interesting.
Paper Bird That Can Fly: Origami Model Guide and Fixes

Marcus Chen
30 Jun 2026

What 'fly' actually means for a paper bird
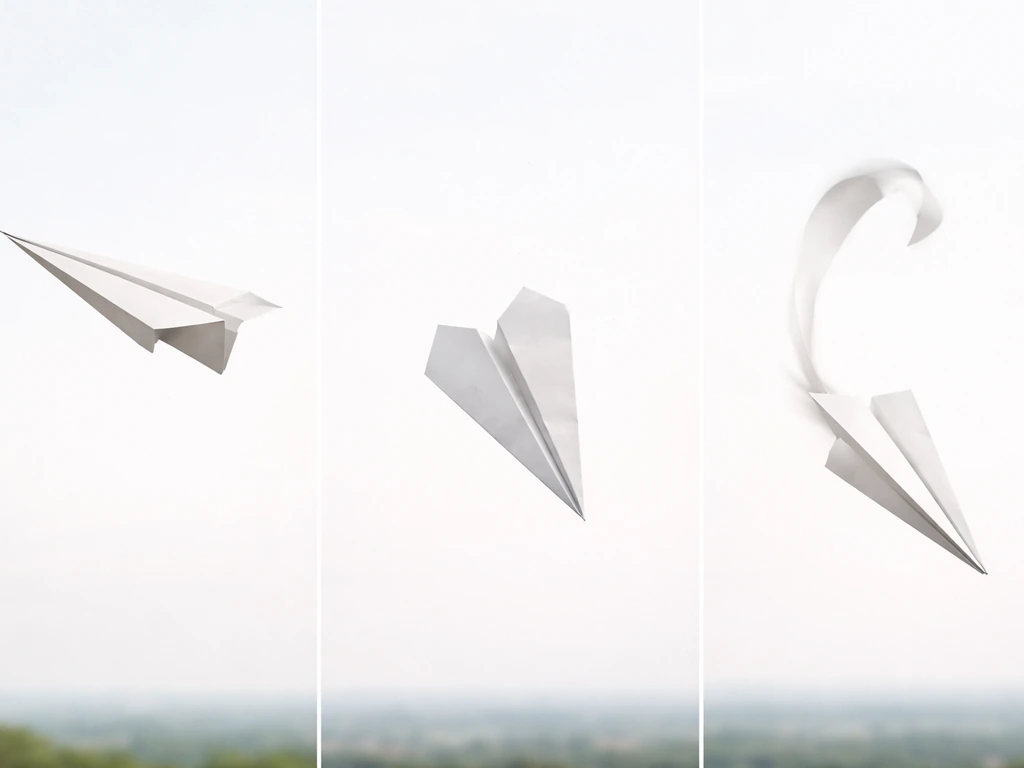
There are three things people usually picture when they imagine a flying paper bird: a gliding model that coasts forward on a smooth trajectory, a flapping origami bird like the classic flapping crane whose wings move but do not generate real lift, and a hang-time throw where the paper stays airborne as long as possible. For a paper model, only the first one, gliding, is aerodynamically achievable with any real performance.
A flapping paper crane is a wonderful kinetic toy, but flapping paper wings cannot generate the timed, asymmetric downstroke that real birds use to produce thrust and lift. The wings are too light and too flexible to do meaningful aerodynamic work. So this guide focuses entirely on building a paper bird designed as a glider, one whose wing geometry, mass balance, and launch angle are tuned to carry it as far and as straight as possible.
Gliding flight, whether performed by a real bird or a paper model, depends on a single core trade-off: lift versus drag. A bird (or your paper model) stays in the air as long as the wings generate enough lift to oppose gravity, and it travels far as long as drag does not kill that lift too quickly. The ratio of lift to drag, called the glide ratio, tells you how many meters forward you travel for every meter you drop.
Gliding flight depends on aerodynamic efficiency, often described by the glide ratio, and that glide ratio varies with airspeed. A well-trimmed paper glider can reach a glide ratio of around 8:1, meaning eight meters of horizontal travel for every meter of descent.
That is the number a beginner should aim for. It is achievable, and it gives you a clear target to optimize toward.
Choose your paper and prep it for lift and durability
Paper choice matters more than most beginners expect. Standard 80 gsm (20 lb bond) printer paper is actually a decent starting point because it is stiff enough to hold crease geometry but light enough to glide. Avoid thin origami paper (35 to 50 gsm) for flying models because the wings flex too easily and collapse under aerodynamic load mid-flight.
Card stock (160 gsm and above) is too heavy for the wing area most origami bird patterns produce, and it tends to stall almost immediately. If you want a step up from printer paper, try 90 to 100 gsm paper, sometimes labeled as 'presentation' or 'copy plus' paper. It holds creases sharply and survives multiple test throws without tearing at the fold lines.
Before you fold a single crease, condition your paper. Run a bone folder or the back of a spoon along the paper grain to flatten any curl. A curled sheet almost always produces asymmetric wings, which causes the bird to veer. Start with a perfectly flat, uncurled sheet every time. When you make creases, press them firmly and completely. Soft creases create rounded surfaces instead of clean aerodynamic edges, adding unnecessary drag. Think of a sharp crease as the paper equivalent of a wing leading edge: clean geometry equals cleaner airflow.
Pick the right folding design and understand the wing geometry
Not every origami bird pattern is built for flight. The traditional flapping crane, beautiful as it is, has too much mass concentrated in the body and too little wing area relative to that mass. What you want is a design that prioritizes a wide, flat wing plane, a forward center of mass, and a tail or rear surface that provides pitch stability. The two designs that consistently outperform others for distance gliding are the dart-body bird (a bird-shaped variant of the classic dart fold, with swept wings and a pointed nose) and the delta-wing bird (a broader, flatter wing design inspired loosely by albatross or swift planform geometry).
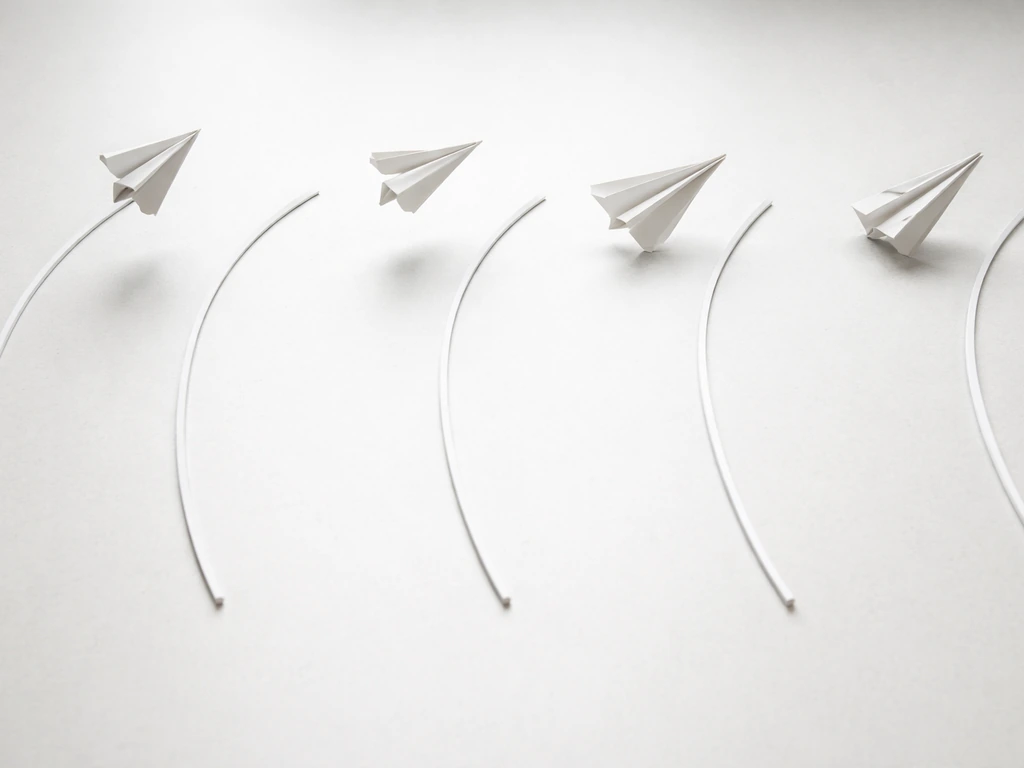
Wing geometry is where real-bird biomechanics and paper folding intersect most directly. Birds that are built for efficient gliding, albatrosses, swifts, frigate birds, have long, narrow wings with a high aspect ratio. That shape minimizes induced drag. For a paper model, you approximate this by making sure the wingspan is at least 1.
5 times the body length. Swept wings improve high-speed stability but reduce low-speed lift; a moderate sweep of around 20 to 30 degrees is the sweet spot for a thrown glider. The other critical geometric feature is dihedral, the upward angle of the wings relative to the body. A dihedral angle of roughly 5 to 10 degrees gives the model passive roll stability, meaning if a small gust tips one wing down, the design naturally corrects itself.
This is exactly what you see in soaring birds like turkey vultures holding that characteristic V-shape with their wings during thermal gliding. That same V-shaped, thermal-gliding look is the closest inspiration to the best flying plane that behaves like a bird soaring birds like turkey vultures.
Comparing two go-to designs
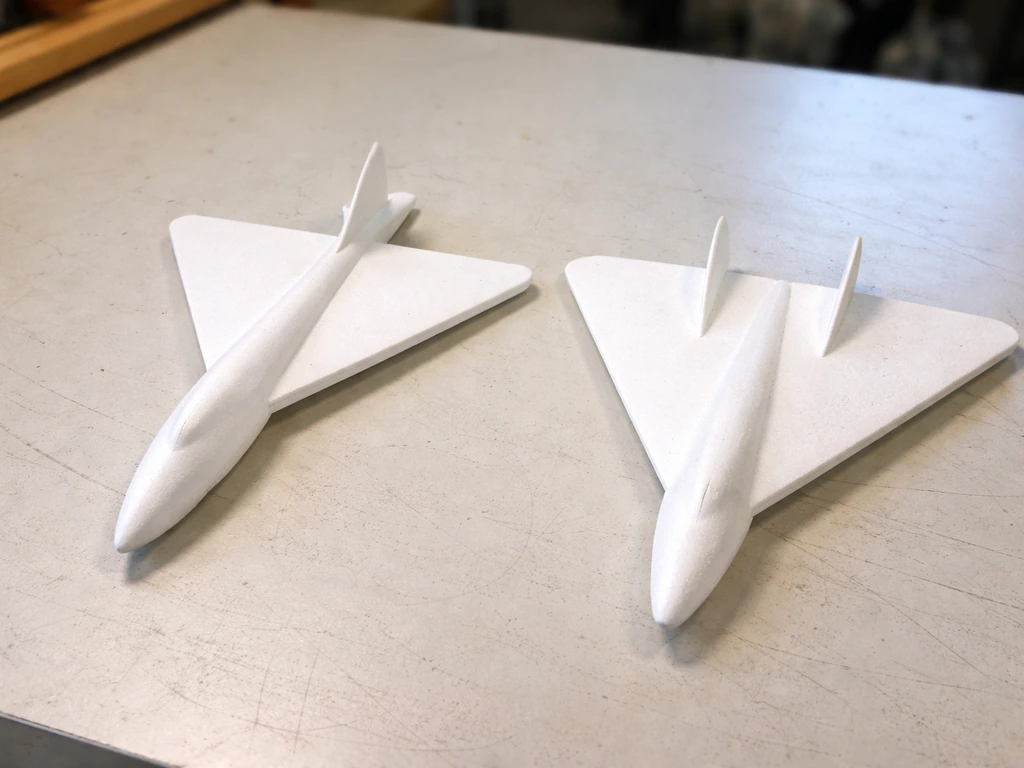
| Feature | Dart-body bird | Delta-wing bird |
|---|---|---|
| Best for | Distance, stable straight glide | Slow, floating hang-time glide |
| Aspect ratio | Medium-high (narrow wings) | Lower (wider wings) |
| Launch speed needed | Moderate to brisk | Gentle to moderate |
| Stability | High pitch stability | High roll stability |
| Beginner difficulty | Easy | Moderate |
| Closest real-bird analog | Swift or peregrine | Albatross or frigatebird |
If this is your first build, start with the dart-body bird. It is more forgiving on launch angle and recovers from minor imperfections in the fold better than the delta-wing version. Once you can get consistent glides of 6 to 8 meters with the dart-body design, the delta-wing becomes a rewarding next challenge. There are also related approaches worth exploring: paper toys designed to mimic bird flight motion and easy origami bird patterns optimized for beginner folders all share overlapping principles with what is described here. Once you have a glider dialed in, you can also look for an origami bird that can fly easy and practice those same setup ideas.
Step-by-step build with performance-focused adjustments
These instructions build a dart-body bird from a single sheet of A4 or US Letter paper. Every step includes a performance note explaining why that step matters aerodynamically.
- Start with your sheet landscape (wide side horizontal). Fold it in half lengthwise, crease firmly, then unfold. This center crease becomes the fuselage spine and your symmetry reference line. Performance note: if this crease is off-center by even 2 mm, the wings will be unequal in area and the bird will veer.
- Fold the top two corners down to meet the center crease, creating a pointed nose. These folds should be perfectly symmetric. Press the creases hard from the tip outward. Performance note: the nose angle sets the effective leading edge sweep. A sharper nose (smaller angle) gives higher speed stability; a broader nose gives more lift at low speeds.
- Fold the outer edges of the upper layer inward to meet the center line again, narrowing the nose further. This double-fold thickens and stiffens the nose, which moves mass forward. Performance note: center of mass should sit at roughly 30 to 40 percent of the total body length from the nose. This is the paper equivalent of a bird's heavy breast muscles sitting forward of the wings.
- Fold the entire model in half along the center spine so the two wing panels are now stacked. Hold the body along the fold and check that the wing tips align exactly when the wings are flat. If they do not match within 1 mm, unfold and refine the earlier steps before continuing.
- Open the wings outward to roughly 180 degrees (flat). Then add your dihedral: gently lift each wing tip upward by about 1.5 to 2 cm relative to the body. Crease lightly at the wing root to lock this angle. Performance note: this 5 to 8 degree dihedral is your passive roll stabilizer. Do not skip it.
- Optional tail feather adjustment: if your design has a rear tip, fold a small 5 mm tab upward at the tail. This acts like a horizontal stabilizer, increasing pitch stability and reducing the chance of tumbling on launch. Think of it as a paper version of a bird's tail feathers fanning out to increase drag at the rear and keep the nose from pitching down.
- Optional reinforcement: run a small strip of clear tape along the underside of the wing root fold. This prevents the wing from splaying open after repeated throws. Do not tape the wing surface itself, as tape adds localized mass and distorts the camber.
Launch setup and testing that actually gives you useful data
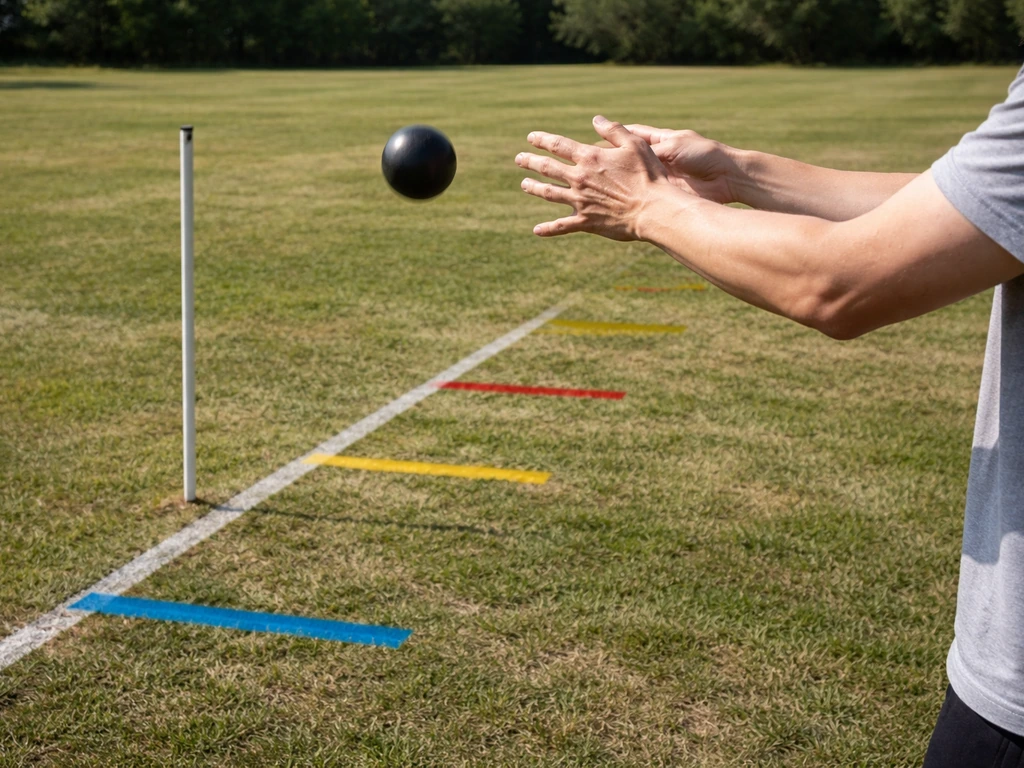
How you throw the model determines whether you are testing the design or just testing your arm. Use a consistent shoulder-height release, roughly 1.4 to 1.6 meters above the ground, with the model held between thumb and forefinger at the nose. The launch angle should be approximately 10 to 15 degrees above horizontal. A horizontal launch tends to produce an immediate nose-down drop before the wings generate lift; too steep an angle stalls the wings immediately. A brisk but smooth throw (not a flick of the wrist) at around 5 to 8 meters per second is your target. This is fast enough to generate meaningful lift without overwhelming the model's structural integrity.
To turn your testing into something genuinely useful, change only one variable at a time and measure the result before changing anything else. This is the same methodology NASA and Science Buddies use in paper glider aerodynamics experiments, and it works just as well in your backyard. Measure your ground distance from launch point to landing, and note the release height. From those two numbers you can estimate your glide ratio: divide horizontal distance by vertical drop (release height minus landing height, which is roughly zero if you are landing on flat ground). A ratio below 4 means your design needs significant trimming. A ratio of 6 to 8 is solid. Above 8 is excellent for a folded paper model.
For a controlled testing setup, use a table or platform of known height (say, 90 cm) and launch from the edge rather than from a standing throw. This removes arm variation entirely and lets you compare fold adjustments head to head. Mark your landing spots with tape and throw each version at least five times to account for slight hand variation. Indoor testing in a hallway eliminates wind as a variable and is worth doing before you take the model outside.
Safe practice tips
- Always throw away from people, particularly children at eye height.
- Outdoors, find a space with minimal crosswind. Even a light 2 to 3 m/s breeze will significantly skew your distance and direction data.
- Retrieve your model gently after each throw. Pinching the nose to pick it up from the ground distorts the leading edge and changes the flight characteristics.
- Number each version of the design with a pencil mark on the underside of the fuselage so you do not confuse iterations during testing.
When it won't fly right: fixing the four common failure modes
Almost every paper bird problem falls into four categories. Here is how to diagnose and fix each one.
Stall: the bird pitches up and falls straight down
A stall means the wings are generating more drag than lift because the angle of attack is too high. In real birds, a stall happens when they slow below their minimum flying speed and the smooth airflow over the wing breaks down into turbulence. For your paper bird, a stall usually means the nose is too heavy (center of mass too far back) or your launch angle is too steep. Fix: add a small paper clip to the nose for one test to shift mass forward, or lower your launch angle to 5 to 10 degrees above horizontal. If the paper clip fixes it, re-fold with slightly more material at the nose rather than relying on the clip permanently.
Veer: the bird curves left or right
Veering is almost always caused by asymmetric wings. One wing has a slightly different area, angle, or surface curve than the other, producing more lift on one side. Hold the model at arm's length and sight down the fuselage from the tail end. Both wings should be at identical angles with no twist. If one wing tip is even slightly higher or lower than the other, gently bend the wing root to match. If the problem persists, the center crease is off and you may need to refold from scratch with extra attention to step one.
Tumble: the bird rolls and spins uncontrollably
Tumbling means your model has no roll stability. Check your dihedral: both wings should angle upward from the body. If they are flat or, worse, angled downward (anhedral), the model is actively unstable in roll. Add 2 to 3 more degrees of dihedral to each wing. Also check that the tail tab (from step six above) is present and symmetric. A bird without a tail is like a hawk with its tail feathers removed: it loses the rear pitch and yaw control that keeps it oriented correctly.
Nose-dive: the bird pitches sharply downward immediately after launch
A nose-dive is the opposite of a stall: too much mass forward, or too little wing area generating lift. First, check whether the nose really is too heavy by removing any tape from the nose area and re-testing. If the problem persists, your wing area may simply be too small for the body weight. Try re-folding with a larger sheet or a less aggressive nose fold to leave more wing surface exposed.
You can also bend the trailing edge of each wing upward by 2 to 3 mm to increase the wing's effective camber and generate more lift at the rear of the wing. This is the paper analog of a bird extending its secondary feathers to increase wing area during slow flight.
The bird-flight science behind every decision you just made
Every fold adjustment you made maps directly onto principles that govern how real birds fly. Understanding those connections turns a craft project into something genuinely illuminating about avian biomechanics.
Lift is generated when air moves faster over the curved upper surface of a wing than the flat lower surface, creating lower pressure above and higher pressure below. When it comes to a bird can fly name, the details of lift generation are the foundation for staying airborne lift is generated. This is Bernoulli's principle in action, and it applies whether the wing is made of hollow bone and feathers or 90 gsm copy paper.
The camber you added with those trailing-edge bends increases the curvature of the wing's upper surface and strengthens that pressure differential. Real birds control this dynamically by adjusting feather position mid-flight; your paper model locks it in at the fold stage, which is why getting the geometry right before the first throw matters so much.
Drag comes in two main forms relevant here. Parasitic drag is friction and pressure drag from the body moving through air; your streamlined nose reduces it. Induced drag is the drag that is a byproduct of generating lift, and it increases as the angle of attack increases. This is why a stalling bird (or paper bird) at high angle of attack experiences dramatic performance loss: induced drag spikes. The swept wing geometry you used reduces induced drag at moderate speeds, which is why swifts and falcons, both built for speed, have heavily swept wings.
Stability is what keeps the model oriented nose-first rather than tumbling. Pitch stability (nose staying pointed forward) comes from having the center of mass ahead of the center of lift. Your forward-heavy nose fold does exactly this. Roll stability comes from dihedral: when a gust tips one wing down, that wing's increased angle of attack generates more lift, automatically leveling the model. Turkey vultures exploit this passive mechanism constantly, holding their wings in a shallow V to stay stable in thermals without active muscular correction. Yaw stability, keeping the nose from swinging left or right, comes from the tail surface, which creates drag at the rear and acts like the feathers on an arrow.
It is worth noting why flightless birds like penguins or ostriches could not perform a glide even if scaled down to paper size. Their wing anatomy has been reduced or repurposed over evolutionary time: penguin wings are rigid flippers optimized for underwater propulsion, and ostrich wings lack the asymmetric feather structure that generates lift. The wing geometry, the camber, the aspect ratio, the leading-edge shape, simply is not there. Your paper bird, even as a folded sheet, has more in common aerodynamically with a soaring albatross than an ostrich does. That is a genuinely strange and wonderful thing to think about while you are standing in a hallway watching it glide.
If you want to push further after mastering this build, exploring designs that mimic different avian wing planforms is a natural next step. There are paper models specifically engineered to replicate the swept-wing efficiency of high-performance soaring birds, and comparing those against the dart-body design you just built is one of the most instructive experiments you can do with nothing more than paper and an afternoon.
FAQ
Can I throw a paper bird like this from a distance by pushing it instead of a shoulder-height toss?
Yes, but only if you treat “hopping” as a re-launch test. The model needs enough forward speed to generate lift on its first glide, so using a bounce off the floor usually hurts glide ratio by losing energy and messing up wing angle. If you must test indoors, launch from a measured platform or table edge and land on flat tape marks instead of catching and re-dropping.
My bird veers left some throws and right other times, what should I check first?
Switch the wing-body mating points rather than adding random tape. Start by ensuring the tail tab is intact and symmetric, then check wing root twist by sighting from the tail end. After that, make a single adjustment: add or remove a tiny amount of nose mass with a small clip, then re-test at the same angle and release height.
What is the right response if it initially floats but then abruptly drops hard?
Don’t chase glide distance by steepening the throw. A too-steep launch can create an immediate stall and shorter, wobblier flights, even if the first seconds look promising. Keep the release angle near 10 to 15 degrees, then adjust either (a) center of mass with a small nose clip, or (b) wing trim using trailing-edge micro-bends (only after you confirm the stall is not from heavy nose or poor crease quality).
My paper bird keeps folding its wings inward after a few meters, how can I stop that?
If the wings are flaring or collapsing mid-flight, the issue is usually paper stiffness and wing loading. Use heavier, stiffer paper (around 90 to 100 gsm), and refold with firmer creases, especially at the leading edge and wing root. Also confirm you are not over-bending the trailing edge, since too much camber can increase drag and cause early failure.
How should I estimate glide ratio if the landing spot is not exactly on the same level as the launch?
For consistent results, measure and land on the same plane and assume landing height is approximately zero only if you truly land on flat ground. If you land in grass, carpet, or a raised surface, measure release height and landing height separately, then compute vertical drop from those two readings before comparing glide ratios.
The model flies differently each time, even though I fold it the same, what throw mistake causes that?
A common mistake is relying on a wrist flick. Use a brisk, smooth acceleration with the model held at the nose so release is clean, then keep the throw repeatable in speed and angle. If you notice big variation, switch to platform launching (table edge) to remove arm variation, then tune folds based on the repeatable data.
Can I adjust multiple things at once to get better performance faster?
Yes, replace the “variable” with smaller, controlled trims. For dart-body gliders, change only one of these per test series: center of mass (clip amount), launch angle, dihedral, or trailing-edge bend amount. If you adjust multiple features at once, you cannot tell whether the improvement comes from stability, lift, or drag reduction.
If my bird both veers and tumbles, where do I start fixing it?
Use the problem diagnosis ladder in order: first check for asymmetry (veering), then roll stability (tumbling), then weight balance and wing area (stall or nose-dive). For example, if it drops straight down, confirm whether it is a nose-dive due to heavy nose or insufficient lift from wing surface, before you change dihedral or tail alignment.
How do I test outdoors if there is always some breeze?
Light wind inside a hallway can still skew results, but you can reduce its impact by testing indoors first and by using a consistent launch direction relative to airflow. Outdoors, throw downwind and upwind at the same angle and compare average distance. If one direction consistently underperforms, your design is probably close to trim and needs more margin via minor dihedral or corrected asymmetry.
What signs mean it’s time to refold instead of trimming with clips and bends?
A simple sanity check is to confirm all key fold lines are sharp and that both wings have matching planform shapes, not just matching angles. If performance is poor across all launch angles, the fold pattern may not be true-to-template for wing span or tail tab symmetry. Re-fold with extra attention to wing span ratio (at least about 1.5 times body length) and wing root alignment, since small geometry errors can dominate over minor launch tweaks.
Next Article
Paper Toy That Can Fly Like a Bird: Build Guide
Build a paper toy that glides and soars like a bird with lift, wing geometry, trim, and troubleshooting steps.
