
To film bird wing flaps in clear slow motion, you need a camera capable of at least 120 fps (ideally 240 fps or higher), a shutter speed roughly double your frame rate, continuous autofocus locked on the bird, and enough light to keep the exposure honest. Get those four things right and the footage will actually show you something real: the distinct downstroke push, the folding upstroke recovery, and the moment the wing transitions between the two. Get them wrong and you end up with smeared, jittery clips that look dramatic but tell you almost nothing about how the bird is actually flying.
Bird Flapping Wings Slow Motion: How to Film and Analyze
Marcus Chen
28 May 2026
What "slow motion flapping wings" actually means for birds
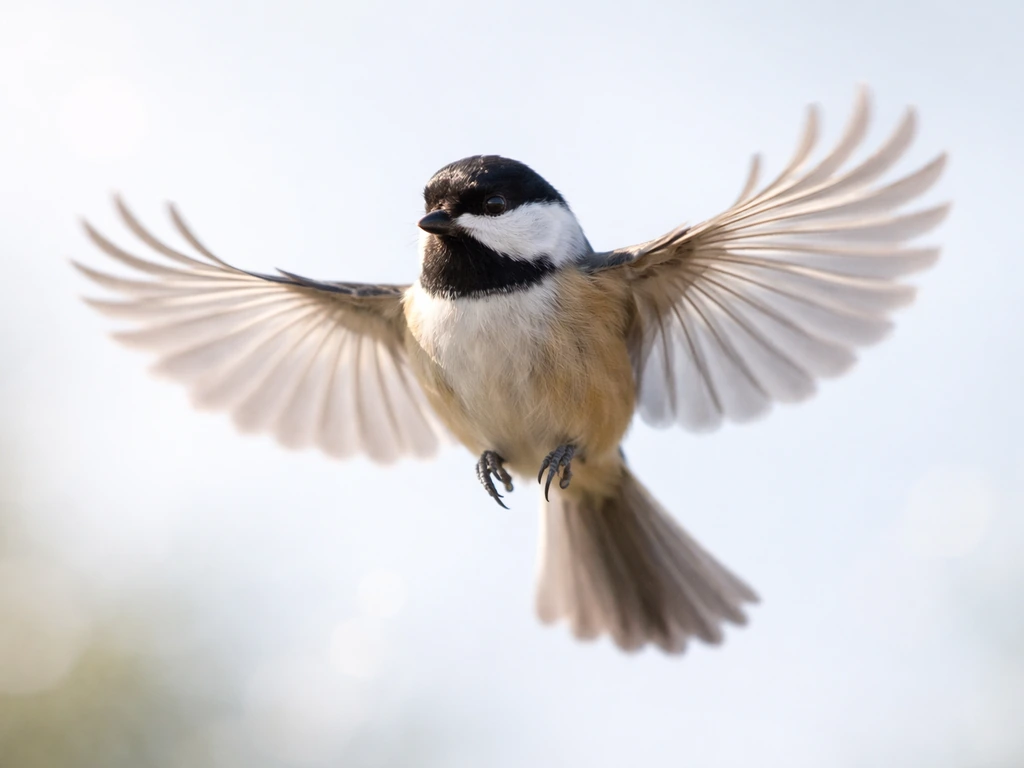
When people talk about bird wing flaps in slow motion, they usually mean one of two things: video recorded at a high frame rate and played back at a normal rate (so everything looks slowed down), or standard footage that has been artificially slowed in editing. Only the first approach gives you scientifically meaningful results. Frame rate is the number of individual images your camera captures per second. Play 240 frames at 24 per second and time appears to stretch to ten times its real duration. That stretched time is what lets you see a wingbeat that normally happens in a fraction of a second.
Why does this matter so much for birds specifically? Because wingbeat frequencies span a wild range. A wandering albatross beats its wings roughly 2.9 to 3.4 times per second during takeoff, which is slow enough that even standard 30 fps footage can capture it reasonably well. A ruby-throated hummingbird beats its wings around 70 times per second. For hummingbirds, Live Science reports wingbeat frequencies around 70 strokes per second, highlighting that their wingbeats are among the fastest of birds A ruby-throated hummingbird beats its wings around 70 times per second.. At 30 fps, you are capturing fewer than one wingbeat per frame, which means the footage shows you almost nothing useful about the motion. To resolve 70 Hz wing motion, you need a frame rate well above 140 fps just to avoid aliasing (where the motion appears wrong because you are not sampling it fast enough). This is why frame rate choice is not aesthetic preference when filming birds: it is a hard physical limit on what you can actually see.
Shutter speed is the other half of the equation. A common cinematography guideline called the 180-degree shutter rule says your shutter speed should be approximately double your frame rate. At 240 fps, that puts your shutter at around 1/480 s. This gives each frame a small but controlled amount of motion blur that looks natural during playback. If you go too slow on the shutter (say 1/60 s while shooting at 240 fps), each frame accumulates so much blur that the wing edges smear into mush. If you go too fast, the footage looks unnaturally stroboscopic. The 1/(2×fps) formula is your starting point, though for very fast-winged birds you will often want to push the shutter even faster to freeze the tips cleanly.
How to actually record usable slow-motion wing flaps
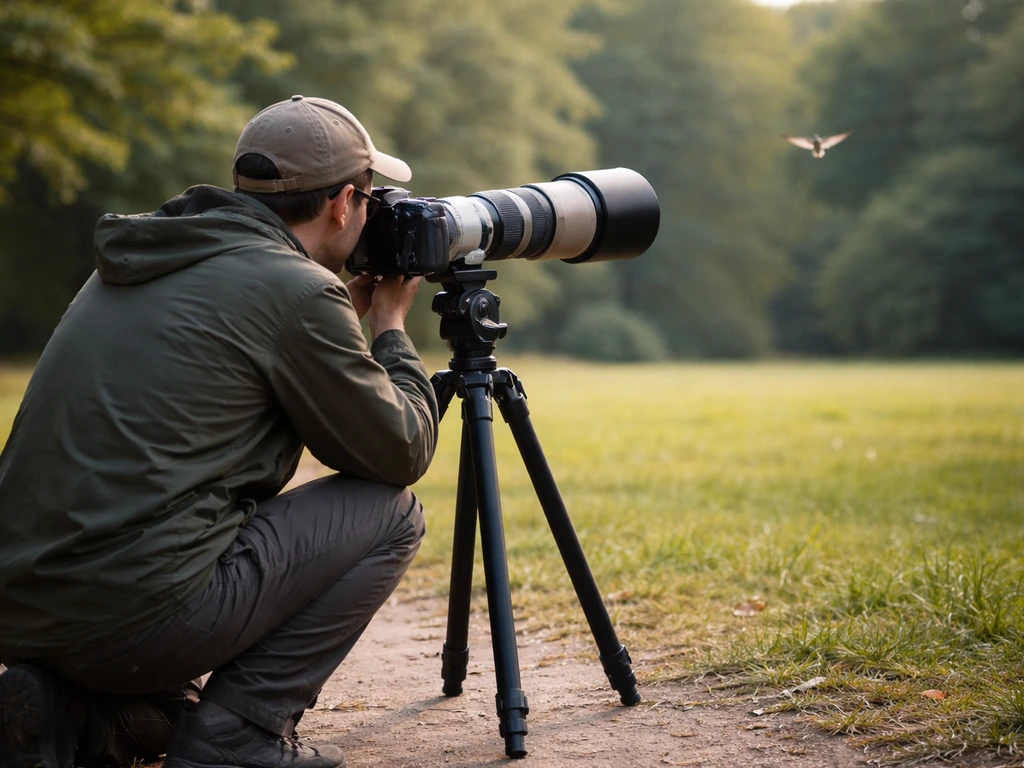
The biggest enemy of slow-motion bird footage is light. Higher frame rates require shorter exposures per frame, which means dramatically less light hitting the sensor. Shooting at 240 fps in decent daylight is manageable on a modern mirrorless camera. With enough light and a high frame rate, you can capture a bird flying in slow motion with clear wing detail Shooting at 240 fps in decent daylight. Shooting at 1,000 fps (where each frame gets roughly 1/2000 s of exposure) demands near-studio-level illumination or a very bright outdoor scene. Plan your shoots for mid-morning on sunny days. Overcast flat light that feels pleasant for a walk will produce muddy, noisy slow-motion clips.
Autofocus is the next challenge. Birds move erratically, and at high frame rates you have very little room for focus drift before the shot is ruined. Use your camera's continuous autofocus mode (AF-C on Nikon/Sony systems, AI Servo on Canon) with subject-tracking enabled. Set your tracking sensitivity to hold on the subject rather than jumping to the background when the bird briefly moves behind a branch. A 400mm to 600mm telephoto lens gives you enough reach without forcing you into the bird's personal space and altering its behavior. Keep the bird filling at least a quarter of the frame so there is enough wing detail to analyze later.
Stabilization matters enormously here. At high frame rates, even a slight camera shake between frames becomes a jarring jitter in playback because the motion is magnified by the slowdown factor. Use a monopod or gimbal head whenever possible. If you are handholding, brace your elbows against your body and pan smoothly with the bird rather than trying to hold still while it moves through frame. Rolling shutter artifacts (where fast lateral motion causes the image to skew or wobble) are worst on handheld shots with lots of relative movement, and they can make wing angles look wrong in ways that are genuinely misleading if you try to measure anything from the footage.
Recommended camera settings as a starting point
| Frame Rate | Shutter Speed (180° rule) | Good for |
|---|---|---|
| 60 fps | 1/120 s | Large, slow-winged birds (herons, pelicans, albatross-type) |
| 120 fps | 1/240 s | Medium birds (pigeons, crows, ducks in level flight) |
| 240 fps | 1/480 s | Small songbirds, sparrows, starlings |
| 480–960 fps | 1/960–1/1920 s | Hummingbirds, swifts, demanding detail work |
| 1000+ fps | ~1/2000 s | Research-grade; requires very bright light and specialized gear |
ISO should be kept as low as your light conditions allow. High ISO introduces grain that obscures fine wing details like primary feather separation and camber changes during the stroke cycle. If you are forced to choose between a cleaner exposure at 120 fps and a noisier one at 240 fps, think about your target species first. For a heron, 120 fps is fine. For a house sparrow, 240 fps is the minimum that will tell you anything real.
Choosing the right bird species and flight scenario
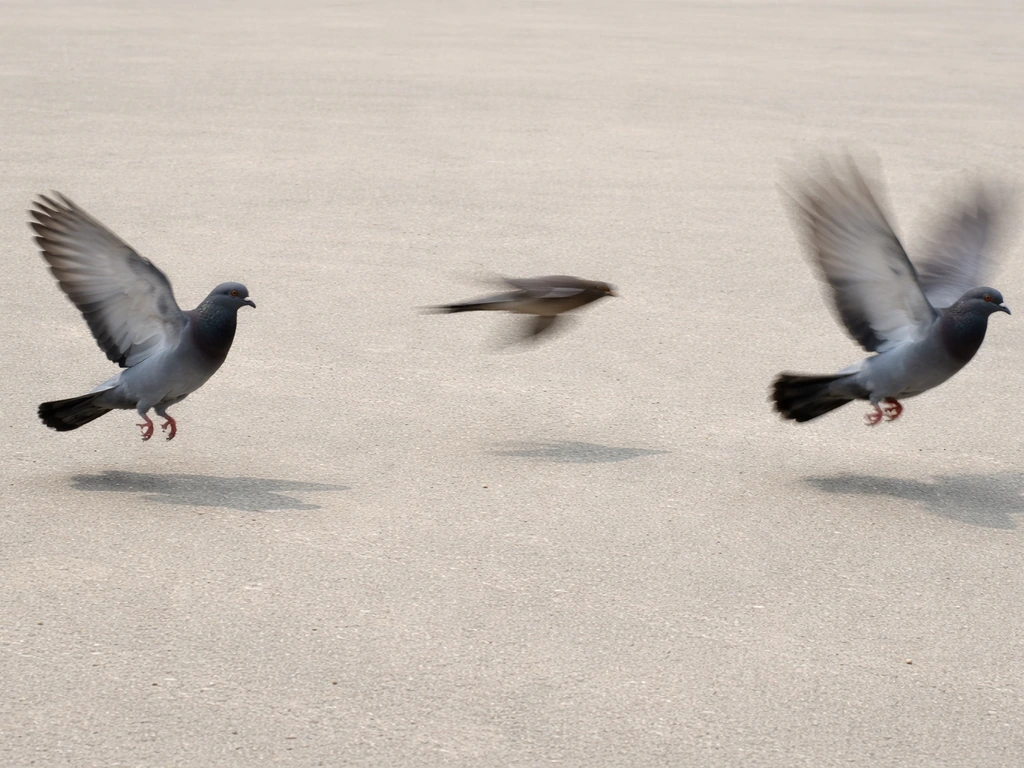
Not every flight situation is equally readable in slow motion. Hovering birds are the easiest starting point because they are not moving through space, which means you can keep them in frame, in focus, and at a fixed distance while they do something mechanically interesting. If you are searching for a video of a bird stuck in mid air, focus on hover footage first, then apply the same high-frame-rate capture principles hovering birds. Hummingbirds hovering at a feeder are the obvious go-to, though their 70-plus beats per second demands high frame rates. Anna's hummingbirds are cooperative feeders and relatively tolerant of observers, making them practical subjects. Kestrels hovering into the wind are another excellent choice: their wingbeat rate is far more modest (around 5 to 8 beats per second), they stay in one place, and their wing geometry during hover is strikingly different from their cruising flight.
For capturing the full wing-flap cycle including takeoff bursts, pigeons in an urban environment are underrated subjects. They are habituated to people, take off explosively (giving you a great downstroke sequence at the moment of maximum force production), and their wingbeat frequency of roughly 5 to 8 Hz is well within reach of 120 fps cameras. If you specifically want the moment of a bird taking off slow motion, prioritize a high frame rate and a fast, stable capture so wing edges stay sharp. Larger waterbirds like great blue herons or pelicans are ideal for beginners because their slow, deep wingbeats (around 2 to 3 Hz) are legible even at modest frame rates, and their large wing area makes stroke phases easy to distinguish.
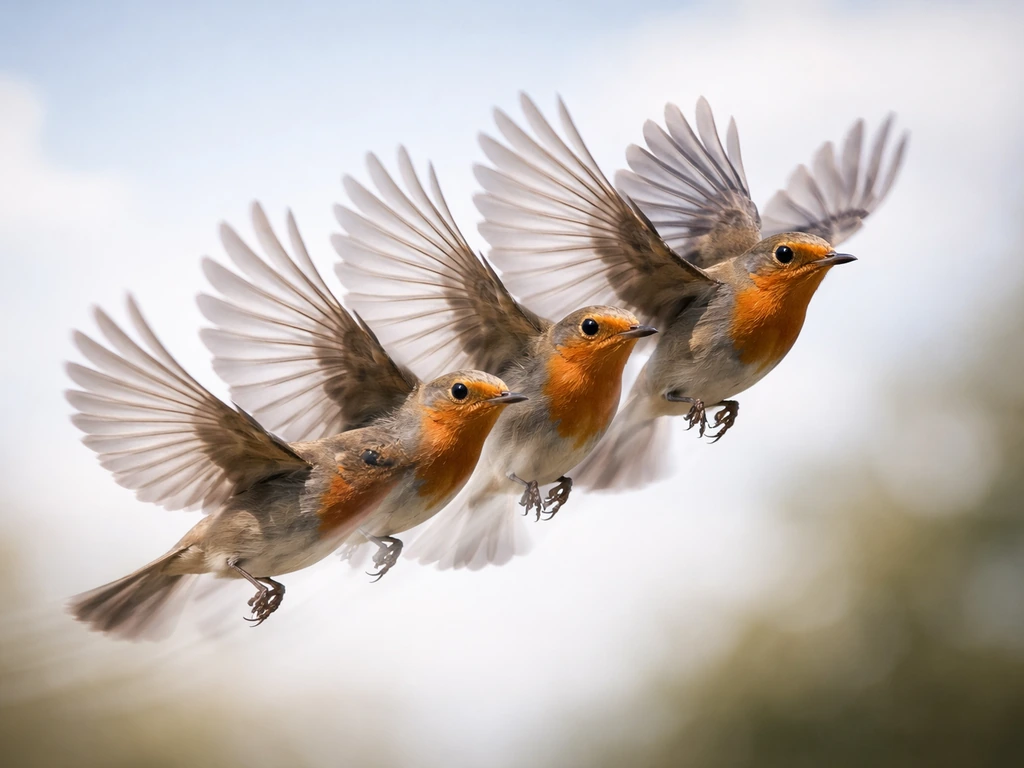
Avoid filming birds flying directly toward or away from the camera if your goal is to understand wing mechanics. A lateral view (the bird crossing perpendicular to your lens) gives you the clearest picture of the full upstroke-downstroke arc. A slight angle (maybe 20 to 30 degrees off perpendicular) can help show three-dimensional wing folding, but pure head-on or tail-on shots collapse the wing motion into a plane that hides most of what is happening. This principle applies equally whether you are studying a slow-motion clip of a bird taking off or analyzing level cruising flight. If you are capturing slow mo bird flying, that same upstroke and downstroke timing will show up clearly when your frame rate and shutter are matched to the species slow-motion clip of a bird.
What the biomechanics actually look like in slow motion
The wingbeat cycle has two main phases: the downstroke and the upstroke. In slow motion, they look quite different from each other, and that difference reflects real differences in muscle activity, force production, and aerodynamic function.
The downstroke: where the power lives
The downstroke is driven primarily by the pectoralis muscle, which is the massive breast muscle that makes up as much as 15 to 25 percent of a bird's total body mass in strong fliers. In slow motion you can see the wing sweeping down and forward, with the primary feathers (the outermost flight feathers) spreading and angling to generate both lift and thrust. The leading edge of the wing stays elevated relative to the trailing edge, maintaining the airfoil camber that produces upward force. Electromyography research shows that pectoralis activity actually decelerates the wing at the very end of the upstroke before powering it into the first third of the downstroke, which is why you will notice a brief deceleration phase in the footage right at the transition point.
The upstroke: recovery, not just dead weight
The upstroke is where slow motion reveals something most people do not expect: it is not passive. The supracoracoideus muscle, running beneath the pectoralis and connecting to the top of the humerus via a tendon-pulley system through the coracoid bone, actively elevates the wing. In hovering birds and slow fliers, this muscle is working hard. In fast-flying birds like swifts and swallows, aerodynamic forces do more of the lifting work during upstroke, and the wing may remain partially extended, generating meaningful aerodynamic force even on the recovery stroke. In slow motion you can distinguish these two strategies: a fully folding, pulled-up upstroke (common in songbirds at slow speeds) versus a partially extended, swept-back upstroke (common in fast gliding species).
Hummingbirds are the extreme case. Their upstroke is not just a recovery: it generates substantial lift on its own. The wing supinates (rotates so the underside faces upward) during the upstroke, allowing the inverted wing to push air downward on the recovery stroke as well. This supination is driven largely by wrist rotation, with the wrist contributing more rotational movement than the shoulder and elbow combined in some studies. In slow motion at 480 fps or above, you can actually see this flip: the wing goes from its normal orientation at the bottom of the downstroke to an inverted orientation partway through the upstroke. It is one of the most visually dramatic things you will see in bird flight footage.
Wingbeat frequency and what it tells you
Wingbeat frequency varies not just between species but within a single bird depending on what it is doing. A house martin, for example, beats its wings roughly 14 percent slower at higher flight speeds than at slow speeds, adjusting frequency and amplitude together to manage aerodynamic power output. In your slow-motion footage, you can measure wingbeat frequency directly by counting complete cycles (one downstroke plus one upstroke) over a known duration. A calculation approach for frequency estimation uses peak count and frame count relative to the video fps, deriving wingbeat frequency from wingbeat and timing information over the analyzed duration measure wingbeat frequency directly by counting complete cycles. The formula is straightforward: count the number of complete wingbeats in your clip, divide by the duration of that clip in real time (not playback time), and you have beats per second. If you shot 240 frames of footage and counted 6 complete wingbeats, and your camera ran at 240 fps, that clip covered exactly one real second: your bird's wingbeat frequency is 6 Hz.
What you can actually measure from slow-motion footage
Good slow-motion footage is not just visually satisfying: it is genuinely measurable. Here is what you can extract from a well-shot clip without any specialized software.
- Wingbeat frequency: count complete cycles over the real-time duration of the clip as described above. This is the most reliable measurement available from consumer footage.
- Stroke amplitude: the total angular arc the wing travels from its lowest point in the downstroke to its highest point in the upstroke. You can estimate this visually by noting the wingtip position at both extremes relative to the body.
- Downstroke-to-upstroke ratio: the proportion of each full cycle spent in each phase. Hovering hummingbirds have a nearly equal ratio; most forward-flying birds spend proportionally more time in the downstroke.
- Wing folding behavior: whether the wing is fully extended, partially folded, or fully folded during the upstroke. This is visible at 120 fps or above for most species.
- Primary feather spread and separation: during the downstroke, the primary feathers spread apart and twist individually to reduce drag and increase efficiency. This is clearest at 240 fps and above.
For more precise angular measurements, you can use free video analysis software (Tracker is a popular open-source option) to digitize specific landmarks frame by frame: the wingtip, the wrist joint, and the shoulder. Plotting the wingtip trajectory over time gives you a direct record of stroke amplitude and frequency, and comparing wrist versus wingtip motion reveals how much of the wing's arc comes from shoulder rotation versus distal flexion. Research-grade kinematic studies use X-ray video (XROMM) to track bone positions directly, but external landmark tracking from good slow-motion footage gets you surprisingly close for most educational or hobbyist purposes.
Common problems and how to fix them
Motion blur and smeared wings
If your wing edges look soft or the tips trail into streaks, your shutter speed is too slow for the frame rate you are using. At 240 fps, your shutter should be at or above 1/480 s. Push it to 1/1000 s if you have enough light and want cleaner wing-tip detail. Yes, this breaks the 180-degree rule, but the rule exists for cinematic aesthetics, not for biomechanical analysis. When you are trying to see what a wing is doing, clean edges matter more than motion-blur character.
Jitter and camera shake in playback
Handheld high-frame-rate footage at telephoto lengths will almost always have some jitter, and in slow-motion playback that jitter looks much worse than it did in real time. Use a fluid head tripod or a monopod with a gimbal head. If you must handhold, pan smoothly and continuously with the bird rather than fighting to hold a static framing. In post-processing, most video editors have warp stabilizer tools, but be aware that heavy stabilization on footage with rolling shutter artifacts can introduce warping that distorts wing angles and makes measurement impossible.
Rolling shutter distortion
Most consumer and prosumer cameras use rolling shutters, meaning the sensor reads out line by line rather than capturing the entire frame at once. When a bird's wing is moving very fast relative to this readout time, the wing can appear skewed or bent in ways that do not reflect reality. You can reduce rolling shutter by using a faster shutter speed (which shortens the exposure window each line receives), minimizing lateral camera movement during capture, and if your camera has it, selecting a crop mode that uses a smaller sensor area with faster readout. For serious analysis, global shutter cameras (increasingly available in high-end mirrorless bodies) eliminate this problem entirely.
Frame rate too low for the species
This is the most common interpretation error in bird slow-motion footage. If your frame rate is not at least twice the wingbeat frequency (the Nyquist limit), the wingbeats you see in the footage may be aliased, meaning the apparent motion looks completely different from the real motion. A hummingbird shot at 60 fps looks like it is barely moving its wings or moving them in a strange, wrong-looking pattern. This is not what the wings are actually doing: it is a sampling artifact. Always verify that your fps is well above double the expected wingbeat frequency before drawing any conclusions from the footage. Related to this, if you are analyzing footage of a bird in very fast cruising flight compared to hovering, remember that wingbeat frequency changes with flight speed, so the same bird may look quite different in different contexts.
Wrong exposure making the bird a silhouette or a blown-out blob
Exposure problems are worse in slow motion because you cannot fix them in post the way you sometimes can with stills. If the bird is backlit (sky behind it), meter for the bird's plumage, not the background. Use exposure compensation to push the exposure up, or position yourself so the sun is roughly behind you. A correctly exposed slow-motion clip where you can see the individual feather layers and the wing surface texture is worth ten times more than a dramatic silhouette that looks cinematic but tells you nothing about what the wing is actually doing.
Filming bird wing flaps in slow motion sits at a genuinely interesting intersection of craft and science. The mechanics you are uncovering, the pectoralis-driven downstroke, the supracoracoideus-powered upstroke, the hummingbird's wing flip, have taken researchers decades of careful study to describe precisely. A well-shot 240 fps clip of a pigeon taking off from a ledge gives you a direct, personal window into the same physics. Get the settings right, pick the right bird for your frame rate, and the footage will teach you things that no diagram can quite convey. If you want a slow motion bird landing shot, apply the same frame rate, shutter speed, and lighting checks so the wing transitions stay crisp slow-motion bird wing flaps.
FAQ
Why do my bird wing slow-motion videos look smooth but the wing movement seems wrong?
If you film at a true high frame rate and then slow it in a timeline, the result is only meaningful when the camera captured enough unique frames during each wingbeat. As a rule, for the wing motion you care about, your recording fps should be well above twice the expected wingbeat frequency (not just close). Otherwise you can create an elegant-looking clip that is scientifically misleading due to aliasing.
Can I analyze wing mechanics from footage I shot at low fps and slowed down in editing?
You can, but the analysis is harder. Start by measuring frequency with what the camera truly recorded (the fps value from the recording, not what it plays back as). Then check whether the visible wingbeat pattern changes when you switch to a higher shutter speed, because aliasing and rolling shutter effects respond differently to these changes.
What should I check if bird wing slow motion looks stuttery or soft instead of crisp?
If your footage looks “choppy” rather than smoothly slowed, check two common causes: dropped frames during capture (look for warnings in-camera or in the file metadata) and playback that is not set to the same fps you recorded (many editors default incorrectly). For wing tips specifically, also verify that your shutter speed was fast enough for the chosen fps so you did not smear the edges.
Is it always bad to break the 180-degree shutter rule for bird wing analysis?
Your shutter angle guidance is a starting point, but for biomechanical clarity you can prioritize faster shutter over “natural motion blur.” If wing tips have streaking, raise shutter speed toward or beyond 1/(2×fps). Do not go so fast that exposure collapses, though, because noisy frames can hide feather boundaries and wing edge angles you want to measure.
How do I measure wingbeat frequency accurately from slow-motion video?
For measuring, you want every wingbeat count to map cleanly to real time. Choose clips where the bird stays in roughly the same distance from the camera, then count complete cycles over a duration you can trust (for example, 2 to 3 seconds of real capture). If the bird changes speed mid-clip, split the analysis into segments rather than averaging across them.
How can I tell if rolling shutter is distorting my bird wing slow motion?
Rolling shutter is often worse when the bird or the camera moves laterally. To reduce skew, keep panning smooth and avoid sudden stops, use a shorter exposure (faster shutter), and if available use a crop or mode that reads out faster. For the cleanest measurements, consider a global-shutter camera if you are doing repeated experiments or comparing wing angles frame-to-frame.
Should I use warp stabilization when analyzing wing angles and trajectories?
Stabilization can help viewing, but measurement can suffer. Warp stabilizers effectively “bend” the geometry to keep the frame steady, which may shift wingtip positions between frames. If your goal is kinematics, stabilize lightly or avoid it during analysis, then apply any stabilization only for public viewing exports.
What’s the best way to prevent autofocus from losing the bird during a high-fps capture?
If focus hunts, you will often see periodic sharpness changes across wing regions rather than consistently soft edges. Improve reliability by using continuous subject tracking, setting the tracking sensitivity to prioritize the bird, and keeping the bird large in frame so the autofocus system has enough detail to lock onto. If branches or perch interruptions happen, expect brief focus swaps and consider selecting a different take rather than forcing it in post.
Why do my slow-motion clips look noisy or blurry even when shutter and fps are correct?
Exposure must be correct at capture, because fast-moving, high-fps clips have less flexibility afterward. Use exposure compensation for the bird’s plumage, especially if the bird is against bright sky. If you can see feather layers and wing surface texture in-frame, you have enough exposure headroom to interpret motion reliably.
Is there a preferred camera angle for capturing bird wing flapping wings in slow motion for analysis?
Head-on or tail-on views can be visually dramatic but they compress the upstroke-downstroke into a less interpretable plane. For analysis, prefer a lateral crossing view, and if you want 3D folding, keep the angle modest (around 20 to 30 degrees off perpendicular). If you must shoot head-on, focus your measurements on timing and cadence rather than wing arc geometry.
Which flight moments are easiest to capture and analyze in bird wing slow motion?
If you want both a clear takeoff sequence and a measurable wingbeat cycle, pigeons are convenient because their takeoff bursts can fit 120 fps capture and their wing frequencies are often reachable. For hovering, prioritize species and moments where the bird maintains position long enough for continuous tracking and framing.
Next Articles
Bird Flight in Slow Motion: How to Film and Analyze
Step-by-step guide to film bird flight in slow motion and analyze wingbeat phases, from camera settings to playback fixe
Slow Mo Bird Flying: Step by Step Guide to Capture Flight
Step-by-step guide to capture slow mo bird flying with camera settings, lens choices, tracking, stabilization, and editi
Bird Flying in Slow Motion: How to Capture and Make GIFs
Capture or make a bird flying in slow motion GIF with smart gear settings, tracking tips, and biology-based flight motio