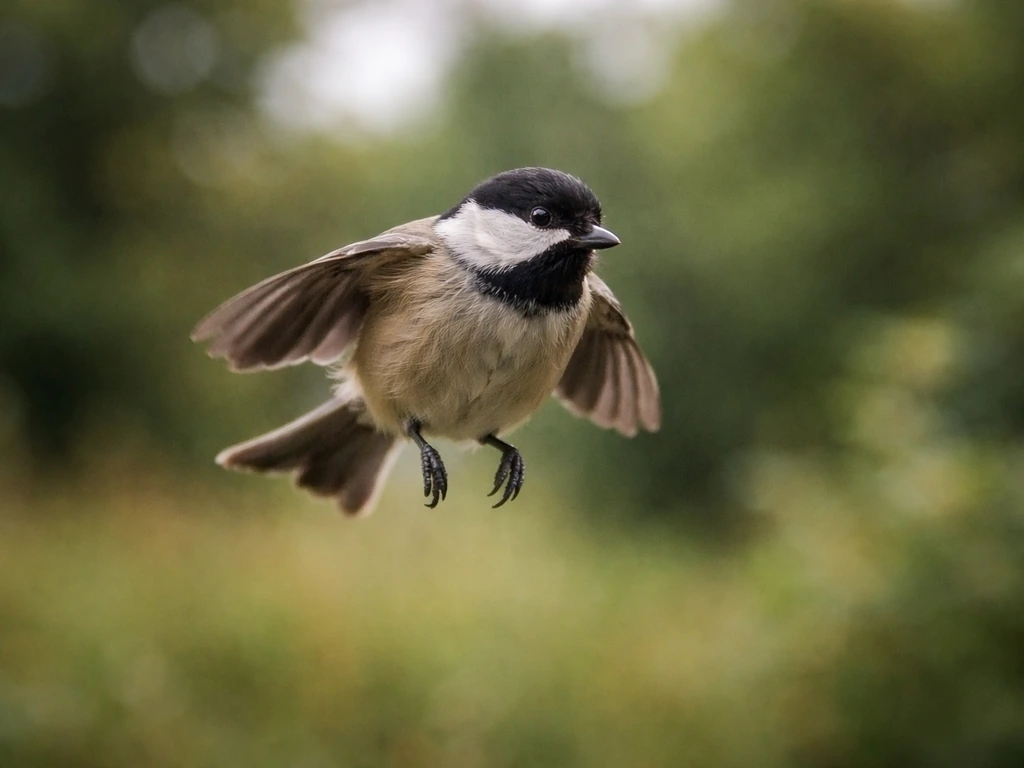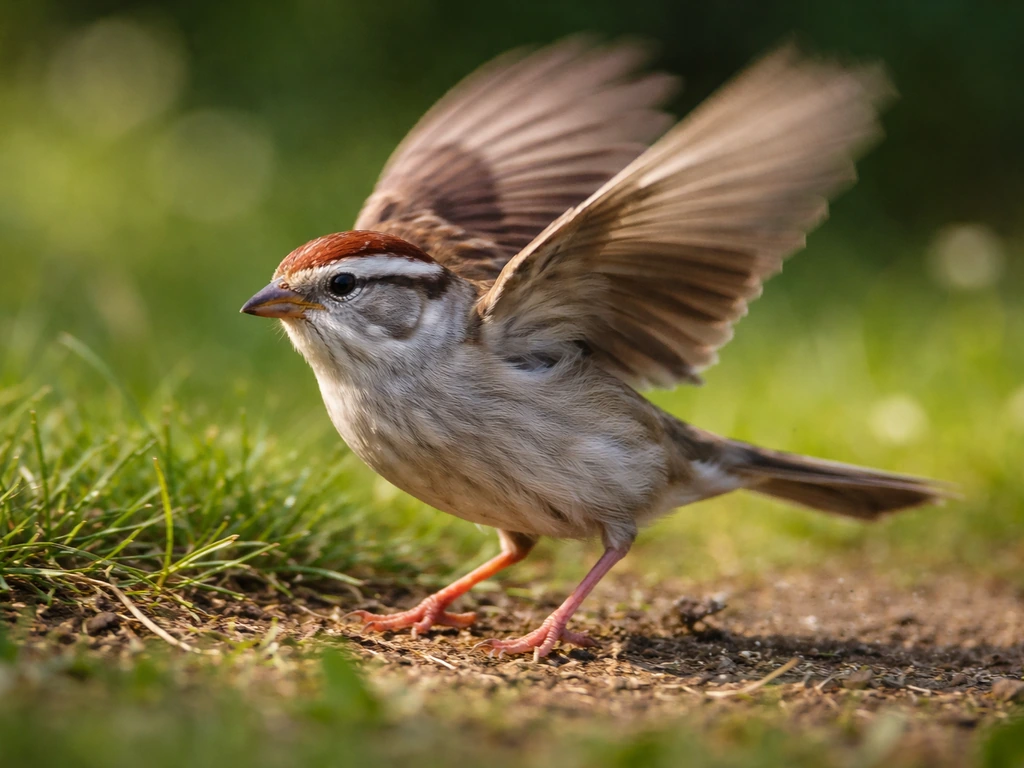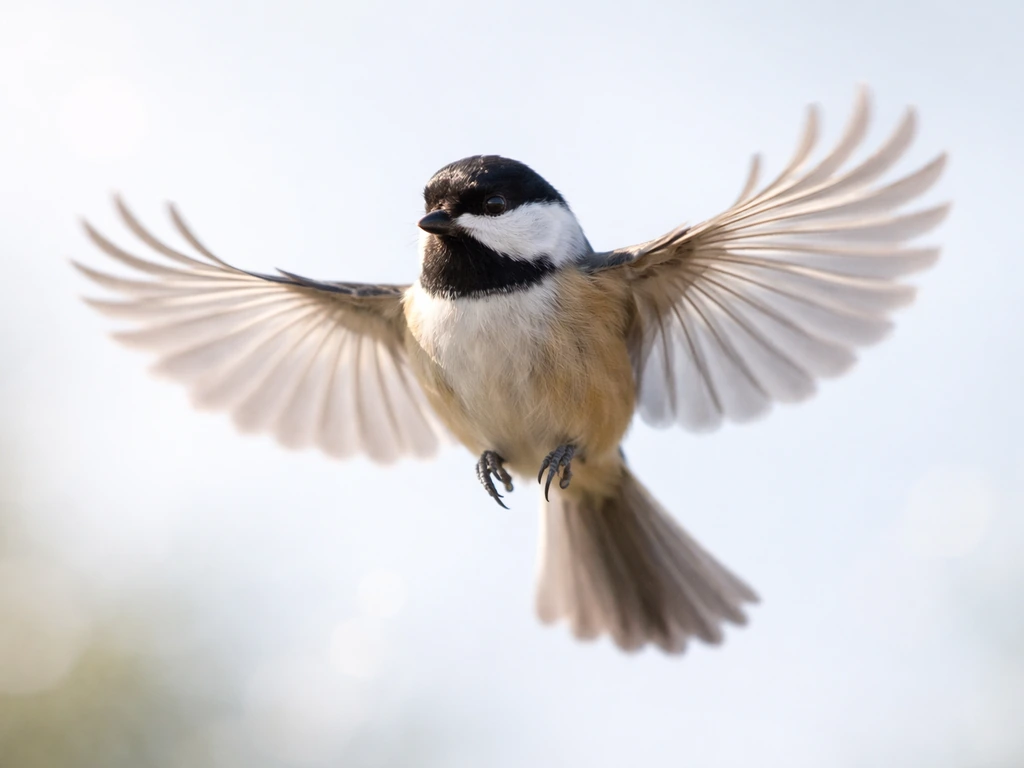
Slow motion bird landing footage compresses what takes a fraction of a second into something you can actually watch: wings arching back, tail feathers fanning wide, legs swinging forward, and the whole body pitching up just before the feet make contact. That single gesture, the flare, is one of the most mechanically sophisticated things a bird does, and normal video simply blurs it into a single frame. At 240 fps or higher, the sequence unfolds clearly enough to measure joint angles, track wingtip paths, and spot the aerodynamic tricks that keep a bird from slamming into its perch.
Slow Motion Bird Landing: Biomechanics, Filming & Analysis
Marcus Chen
26 Jul 2026
What you'll get out of this article
This guide is written for curious learners, birders, videographers, biomechanics students, and educators who want to understand what's actually happening when a bird lands, and how to capture and interpret footage of it responsibly. By the end you'll be able to describe the distinct phases of a bird landing and the forces at work in each one, identify the control surfaces birds use and when they deploy them, set up a camera rig with the right frame rate, shutter speed, and lighting to capture clean footage, apply a basic measurement protocol to extract wing angle, velocity, and body posture from your clips, and avoid the most common misinterpretations that come up when people analyze slow-motion bird video.
Key terms before we go further
A few definitions will make the rest of this much easier to follow. Lift is the aerodynamic force acting perpendicular to the bird's flight path, generated mainly by the wings. Drag is the force opposing forward motion. Angle of attack is the angle between the wing's chord (the straight line from leading edge to trailing edge) and the oncoming airflow. Increase the angle of attack and lift rises, up to a point, after which the wing stalls and lift collapses. The flare is the dramatic upward pitch of the wings and body that birds execute in the final meters of approach, using high angle of attack to spike drag and dump speed. Touchdown is the moment feet contact the surface. Kinematics describes the geometry of motion: position, velocity, acceleration, joint angles, without worrying about the forces causing them. Biomechanics goes further and connects those motions to the forces and muscle activity driving them. Understanding both layers is what slow-motion footage, analyzed carefully, makes possible.
What slow motion actually makes visible (and what it can't tell you)
High-speed video, typically 240 to 1000 fps for bird work, resolves events that happen on timescales of 10 to 50 milliseconds. That's fast enough to track individual wingbeat phases, watch the alula (the small thumb-like feather group at the leading edge) deploy as a stall-prevention device, and see how the tail spreads and tilts to generate both lift and drag simultaneously. It also makes visible the compression and rebound of the leg as it absorbs landing forces, which Green and Cheng's 1998 study of pigeon landings measured at roughly 2 to 8 times body weight.
That said, standard slow-motion video has real limits. It gives you a 2D projection of a 3D event, so any movement toward or away from the camera is compressed or invisible. It tells you nothing directly about muscle activation, air pressure distribution, or actual force production. Wake structures, the swirling vortex trails that tell researchers how lift is actually being generated, can be inferred from feather flutter patterns and body motion but can't be measured from surface video alone. Particle image velocimetry (PIV) studies like Warrick et al.'s hummingbird wake work are needed for that. Slow-motion footage is, however, an excellent first tool for kinematics, and the insights it offers are genuinely impressive even without a wind tunnel.
The approach phase: what the bird does before the flare
During the approach, a bird transitions from cruising flight into a controlled deceleration. Watch this phase in slow motion and you'll notice several things happening in coordination. The body tilts progressively more nose-up, increasing the whole-body angle of attack and shifting the balance of lift and drag. Wingbeat amplitude typically decreases, and some species switch from continuous flapping to intermittent bounds or glides. The tail spreads laterally and depresses slightly, adding surface area and increasing drag without stalling the wings. Legs, which are tucked tight against the body during cruise, begin to swing forward and downward.
Different species modulate this phase quite differently. A Harris's hawk, as motion-capture work published in Nature (2022) demonstrated, executes a powered dive followed by a sharp pitch-up transition timed to bring the bird precisely to stall speed at the perch, with estimated specific power in the range of 19 to 23 W per kilogram during that maneuver. A pigeon takes a shallower, more gradual approach. A swift, whose wings are built for high-speed soaring and are comparatively inflexible, uses a very different geometry. These differences show up clearly even in consumer slow-motion footage if you know what to look for.
Body posture and wingbeat modulation
Tobalske's 2007 synthesis of avian flight biomechanics notes that during landing the downstroke becomes shallower and the upstroke increasingly active in generating drag rather than simply recovering the wing. In slow motion you can see the wing tip path flattening: instead of a deep figure-eight arc, the wingtip traces a shallower loop, indicating reduced stroke amplitude. Simultaneously the wrist joint (the carpal joint, which sets the sweep and camber of the outer wing) begins to flex more aggressively, reducing the effective wing area.
Tail spread and leg positioning
The tail's role is underappreciated. Fanned out fully, the tail can contribute meaningful lift and drag and, crucially, pitch control. A depressed tail with a positive angle of attack generates a nose-up pitching moment, helping the bird rotate into the flare without requiring the wings to do all the work. Legs swinging forward also shift the center of mass, contributing to that pitch-up rotation. In passerines landing on a thin branch you can see the legs reach forward remarkably early, often three or four wingbeats before touchdown.
The flare, touchdown, and energy dissipation
The flare is the moment everything gets interesting. The bird sweeps both wings upward and backward into a near-vertical or even slightly reversed position, dramatically increasing the angle of attack of the entire wing surface beyond what would normally be used in level flight. This spikes drag and reduces lift simultaneously, dumping kinetic energy fast. It's essentially a controlled stall. The leading-edge vortex that stabilizes lift during normal flapping flight (the same mechanism Sane's 2003 aerodynamics review describes for insect wings, and which operates in birds too) breaks down, and the bird falls the last few centimeters onto its perch rather than flying onto it.
Touchdown mechanics are more complex than they look. Roderick et al.'s 2019 eLife study of Pacific parrotlets using high-speed cameras showed that the foot and toe kinematics change stereotypically on contact: claws actively search for grip points on complex surfaces within milliseconds of first contact, and the gripping reflex is partly triggered by mechanoreceptors in the feet rather than being entirely pre-programmed. The legs then act as a spring-and-damper system, flexing at the ankle (actually the intertarsal joint in birds) and knee to absorb the impact energy that Green and Cheng quantified as up to 8× body weight in pigeons.
How energy is actually dissipated
Energy dissipation during landing happens through three overlapping mechanisms. Aerodynamic braking (the flare) does most of the work before contact. Leg compliance absorbs the impact impulse after contact. And in many species, one or two additional wingbeats after touchdown provide a final braking force. In slow motion these post-contact wingbeats are easy to see, and beginners sometimes misread them as preparation for a second takeoff. They're actually braking strokes: the wings are pitched to generate drag rather than lift, with the body weight already transferred to the feet.
Aerodynamic phenomena you can spot in slow motion
You won't see wake vortices directly in standard slow-motion footage, but you can see their signatures. Individual feathers, especially the primary tips, flutter in patterns that indicate flow separation: the point at which smooth airflow detaches from the wing surface. During the flare, separation moves rapidly from the tip toward the root as the whole wing stalls, and in high-quality footage you can watch this happen feather by feather. Similarly, the alula, that small first-digit feather group, often deploys during the approach to maintain attached flow over the leading edge at high angles of attack, delaying full stall just long enough for the bird to complete its approach.
Hummingbirds add another layer. Warrick et al.'s flow visualization work showed that hummingbirds produce roughly 75% of their lift on the downstroke and about 25% on the upstroke during hover, with leading-edge vortex structures stabilizing both strokes. During a landing approach a hummingbird modulates this asymmetry, and you can see the upstroke become progressively more feathered (reduced area) as the bird decelerates. The wingtip vortex sheds from the tips of the primaries, and in very high frame rate footage the slight inward curl of the outermost primary during the downstroke is visible evidence of that vortex forming.
Wings, tail, and legs as control surfaces
Birds have three independently controllable aerodynamic surfaces, and they use all three during landing. Each surface contributes to lift, drag, and pitching moment, and their timing during the approach and flare is precise enough to be studied frame by frame.
| Control surface | Primary role during approach | Primary role during flare/touchdown | Visible slow-motion indicator |
|---|---|---|---|
| Wings (primaries + secondaries) | Modulate lift and deceleration via stroke amplitude and wrist flexion | High-AoA drag spike; controlled stall; post-contact braking strokes | Stroke amplitude reduction; wrist flexion angle; alula deployment |
| Tail (rectrices) | Spread for drag and pitch-up moment; yaw correction | Fully fanned; depressed below body axis to increase drag | Fan width; tail depression angle relative to body |
| Legs and feet | Swing forward to shift center of mass and assist pitch-up | Flex on contact to absorb impact (2–8× body weight) | Leg extension timing; joint flexion on impact; claw search behavior |
The coordination timing matters enormously. In passerines, leg extension typically begins 3 to 5 wingbeats before touchdown. Tail spread begins slightly earlier. The flare itself is compressed into the final 100 to 200 milliseconds. This is exactly why 30 fps video misses most of it: at 30 fps you get roughly 3 to 6 frames across the entire flare sequence. At 240 fps you get 24 to 48 frames, enough to see each phase distinctly.
Species comparisons: not all landings look alike
Different bird groups have evolved distinctly different landing strategies, and slow-motion footage makes these differences stark. Raptors typically use a fast, steep approach followed by a dramatic flare, maximizing aerodynamic braking before contact. Passerines (sparrows, finches, robins) tend toward shorter, shallower approaches with more reliance on leg compliance at touchdown. Swifts, whose wing anatomy is optimized almost entirely for sustained high-speed flight, avoid landing as much as possible and when they do land (usually on vertical surfaces) they use a near-vertical approach that looks almost like a controlled crash. Hummingbirds hover near the target and then simply cease hovering, dropping onto a perch with minimal forward speed.
| Species group | Approach angle (approx.) | Flare duration (approx.) | Wingbeats before touchdown | Notable feature |
|---|---|---|---|---|
| Raptors (e.g., Harris's hawk) | Steep (30–60°) | 150–300 ms | 2–4 powered strokes | High-speed pitch-up transition; talon spread |
| Pigeons (Columbidae) | Shallow (10–25°) | 100–200 ms | 3–6 strokes | Measured at 2–8× body weight impact; gradual flare |
| Passerines (small perching birds) | Variable (15–35°) | 80–150 ms | 3–5 strokes | Early leg extension; high leg-compliance contribution |
| Hummingbirds | Near-horizontal or hovering | 50–100 ms | Hover → drop | Upstroke feathering; asymmetric lift modulation |
| Swifts (Apodidae) | Steep to near-vertical | Very brief (<80 ms) | 0–1 strokes | Near-stall whole-body pitch; claws-first contact |
These ranges are approximate and drawn from the published kinematic literature. Individual variation within species is substantial, and wind conditions, perch geometry, and the bird's prior speed all shift the numbers. Treat the table as orientation, not gospel.
How to film it: practical setup for slow-motion bird landing footage
Consumer cameras capable of 240 fps at 1080p (Sony RX100 series, newer iPhone models, GoPro Hero series) are genuinely adequate for observational work. For clear visual examples, check out bird flapping wings slow motion footage showing the wingtip paths and joint angles in real clips. For anything you want to measure, you need to think carefully about four variables: frame rate, shutter speed, field of view, and lighting. For clear visual examples of the kinematic features discussed here, see slow mo bird flying clips that illustrate approach, flare, and touchdown frame by frame.
- Frame rate: 240 fps captures the flare clearly for most species. For hummingbirds or very small passerines, 480 fps is better. True research-grade work uses 1000 fps or higher, but consumer tools still reveal the major phases.
- Shutter speed: Set shutter speed at roughly double the frame rate (so 1/500 s at 240 fps). Slower shutter produces motion blur that smears wing edges and makes angle measurement impossible.
- Field of view: Narrow the frame to cover a known landing spot (a specific perch or feeder). This maximizes resolution on the bird and lets you place a calibration object (a ruler or a known-length stick) in the same plane as the bird's motion.
- Lighting: Outdoors, bright even overcast is ideal. Avoid harsh directional sun, which creates shadows that obscure wing shape. Indoors or in low light, you'll need supplemental continuous LED lighting; avoid flash, which doesn't work with high frame rates.
- Camera angle: Shoot from the side, perpendicular to the bird's line of approach, to minimize perspective distortion. A tripod is non-negotiable at high frame rates because camera shake is amplified in slow playback.
Staging a landing site
The most consistent footage comes from situations where you know where the bird will land. A bird feeder with a predictable perch, a water bath with a known landing branch, or a raptor mews where trained birds land on a glove at a fixed position all work well. Place a calibration object (a 30 cm ruler, a wooden dowel of known length) at the bird's landing position and in the plane of flight before the bird is present. You'll use this later to convert pixels to real-world distances.
Measuring what you filmed: a simple analysis protocol
Once you have footage, several free tools make frame-by-frame analysis accessible without a research lab. Kinovea is the most user-friendly starting point: it allows frame-by-frame playback, manual angle measurements, and length calibration using your reference object. Tracker (from Open Source Physics) adds curve fitting and basic velocity/acceleration extraction. For more advanced work, Hedrick's DLTdv8 provides full 2D/3D digitizing with wand calibration and Kalman-filter-assisted tracking, and DeepLabCut (Mathis et al. 2018) offers convolutional-neural-network-based markerless pose estimation that can automatically track anatomical landmarks (wingtip, wrist, tail base, foot) across hundreds of frames once trained. ImageJ/Fiji is useful for preprocessing: adjusting contrast, correcting lens distortion, and calibrating pixel scale. OpenCV, if you write Python, handles batch optical flow and custom tracking pipelines.
- Import your clip into Kinovea or Tracker. Set playback to 1× (real-time) first to confirm the event is captured, then step through frame by frame.
- Calibrate scale: use your reference object to set the pixels-per-centimeter ratio. Do this in the same focal plane as the bird.
- Identify key frames: the first frame of the flare (wings begin sweeping back), the moment of foot contact, and the first post-contact frame where the bird is stationary.
- Mark anatomical landmarks: wingtip, wrist, shoulder, tail base, and foot in each key frame. Measure the angle of the wing chord to the body axis and the body angle to the horizontal.
- Estimate approach velocity: measure the displacement of a fixed point on the body (the head works well) between frames, divide by frame interval, and convert using your pixel calibration.
- Note any artifacts before reporting: see the section below.
Artifacts and misinterpretations to watch out for
Slow-motion footage invites overconfident interpretation, and a few specific artifacts cause most of the problems. Motion blur from too-slow shutter speed makes wing edges fuzzy and angle measurements unreliable. Aliasing occurs when the wingbeat frequency happens to be near a harmonic of the frame rate, producing a frozen or slowly-drifting wing that appears stationary but is actually beating normally: this is the bird equivalent of the wagon-wheel effect in film. If a bird appears to be suspended in mid-air with wings barely moving in your slow-motion clip, check the arithmetic before claiming it's hovering. Perspective distortion compresses depth: a wing sweeping toward the camera looks shorter than one sweeping away. Wind effects can make a bird appear to hover motionlessly when it is actually making rapid fine adjustments you can't see at that frame rate. Always note wind conditions during filming.
A related topic worth reading alongside this one is the phenomenon of birds that appear stuck in mid-air in video: the same aliasing and frame-rate effects that cause frozen wings in landing footage can make a bird in level flight appear completely motionless. The underlying physics of how birds maintain position and adjust control surfaces during what looks like hovering is genuinely interesting and connects directly to the approach-phase mechanics described here.
Ethical and safety considerations
Filming birds close up involves responsibility. For wild birds, always prioritize the bird's behavior over your footage: if the bird is visibly disturbed, altering its path or flushing repeatedly, move back. Nesting sites should not be used as filming locations during the breeding season. For trained raptors in falconry or research settings, follow the handler's instructions exactly: flashing lights, sudden movements, and loud equipment noises can cause injuries. High-speed cameras sometimes use bright continuous LED arrays that could startle birds; diffuse and position them before introducing the bird to the environment. Never bait birds onto landing spots in ways that would disrupt their foraging ecology or expose them to predation risk.
Suggested image types for illustrating this topic
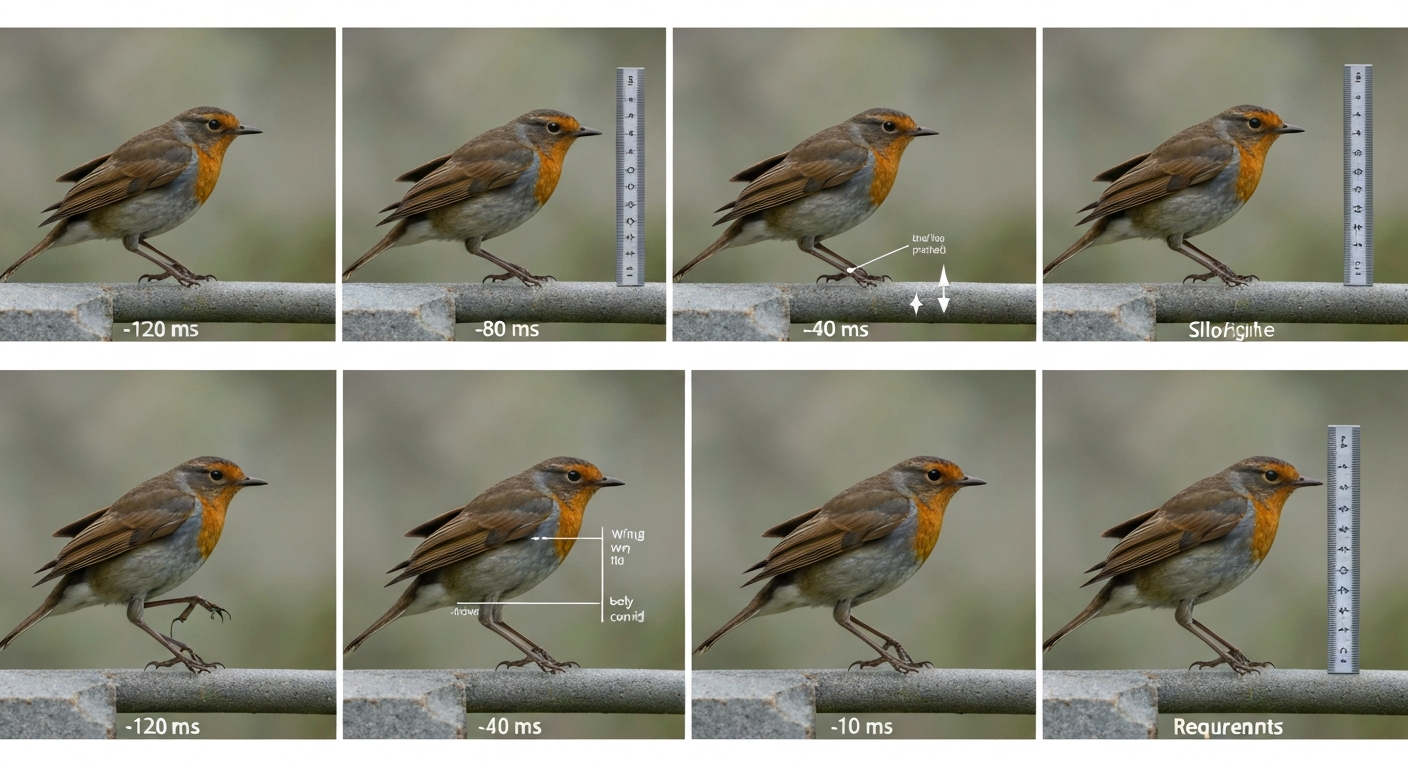
If you're producing content around slow-motion bird landing footage, the most informative image types are: a sequence strip showing 6 to 8 frames across the flare phase with frame timestamps visible, annotated with body angle and wing angle labels; a schematic diagram overlaying lift, drag, and resultant force vectors on a silhouette bird at three approach angles; a calibrated screenshot from Kinovea or Tracker showing a wing angle measurement on a real frame; and a side-by-side comparison of the same landing in normal playback versus slow motion to make the resolution difference concrete. These support the kinematic concepts without requiring a full laboratory setup.
Connecting this to the broader picture of bird flight
A bird landing is in many ways the inverse of a bird taking off, and the two maneuvers share control-surface logic even as they differ in direction and energy budget. See related slow-motion bird takeoff footage for the mirror-image mechanics of launching versus landing. Takeoff demands rapid lift generation from near-zero speed, while landing demands rapid lift reduction to near-zero speed. The flapping mechanics during both transitions are closely related, and if you've watched slow-motion footage of a bird launching from a branch, the mirror-image relationship with the flare becomes obvious. Similarly, the fine wingbeat modulation visible during approach connects directly to what you'd study in bird flapping wings slow motion or bird flight in slow motion analysis more broadly: the landing phase is simply the most mechanically extreme end of the same kinematic spectrum birds navigate every time they fly. For more examples and analyses, see bird flight in slow motion (resource ID 2c585ec5-23d9-4bd9-9d29-e9089687e8e2). See the companion piece on bird flying in slow motion for additional examples and analysis of wingbeat modulation and kinematic patterns.
Understanding how birds land also clarifies why certain wing shapes evolved the way they did. Raptors have broad, slotted primaries that resist tip stall at high angles of attack, a direct adaptation for the aggressive flares their hunting landings demand. Swifts' narrow, swept wings are superb at cruise but make landing so aerodynamically awkward that most swift species land as rarely as possible. Hummingbirds' symmetrically shaped wings, capable of generating lift on both strokes, give them the hovering precision to approach a perch from essentially any angle. Every slow-motion landing clip you watch is, in this sense, a small evolutionary argument made visible.
FAQ
What does slow motion bird landing footage show that real‑time video does not?
Slow‑motion footage reveals rapid, millisecond‑scale adjustments in wing, tail and leg kinematics (stroke amplitude, wing pitch, tail spread), transient aerodynamic events (leading‑edge vortices, wake capture, rapid changes in angle‑of‑attack), and short‑duration contact dynamics at touchdown. It exposes phases—approach, flare, touchdown—with measurable velocity, deceleration spikes, and timing relationships between body pitch and limb deployment that are invisible or blurred in real time.
Who benefits from analyzing slow‑motion landing footage and why?
Curious learners and birders gain intuitive understanding of maneuvers; videographers learn capture best practices; biomechanics students and researchers obtain quantitative kinematics and aerodynamic inference; educators get demonstrable examples for teaching flight mechanics. Each group uses footage at different depth — from qualitative illustration to rigorous, calibrated measurements for hypothesis testing.
Which scientific concepts and terminology should readers understand before interpreting footage?
Key terms: approach, flare, touchdown; angle of attack, lift, drag, induced/added mass forces; wingbeat frequency, stroke amplitude, wing twist, wing pitch; leading‑edge vortex (LEV), wake capture; deceleration, peak acceleration, impulse; calibration (pixel‑to‑metric), DLT (direct linear transformation). The article gives concise definitions and context for each.
What empirical evidence and literature provide baseline expectations for landing kinematics?
Recommended baseline sources: Tobalske (2007) for avian flight biomechanics; Sane (2003) for unsteady aerodynamics; species‑specific studies such as Green & Cheng (1998) on pigeons, Warrick et al. on hummingbirds, Roderick et al. (2019) parrotlet landing data, and the 2022 Nature hawk perching optimization. These provide quantitative ranges (wingbeat frequency, deceleration, perch forces) and methodological examples.
What filming recommendations (frame rates, shutter, lighting, staging) ensure useful slow‑motion analysis?
Frame rate: 500–2000 fps for small, fast wingbeats (hummingbirds, swifts); 250–1000 fps for passerines/raptors depending on speed. Shutter: use short exposure (1/2–1/8 of frame period) to minimize motion blur. Lighting: bright continuous LED or high‑power flood arrays to allow short exposures; avoid flicker. Staging: neutral textured backgrounds, known scale objects, perpendicular camera baseline to primary motion for 2D, and multiple synchronized cameras for 3D. Record ambient wind conditions and behavior context.
How should videographers calibrate and prepare footage for measurement?
Include scale references (ruler, wand) in the imaging volume and perform geometric calibration: single‑camera pixel calibration for 2D or wand/multi‑point calibration for multi‑camera DLT. Correct lens distortion (intrinsic calibration). Record camera settings, lens focal length and camera separation/angles. Capture a calibration wand or checkerboard before/after trials and document environmental conditions.